Category: Asian

Keto Chicken Lettuce Wraps

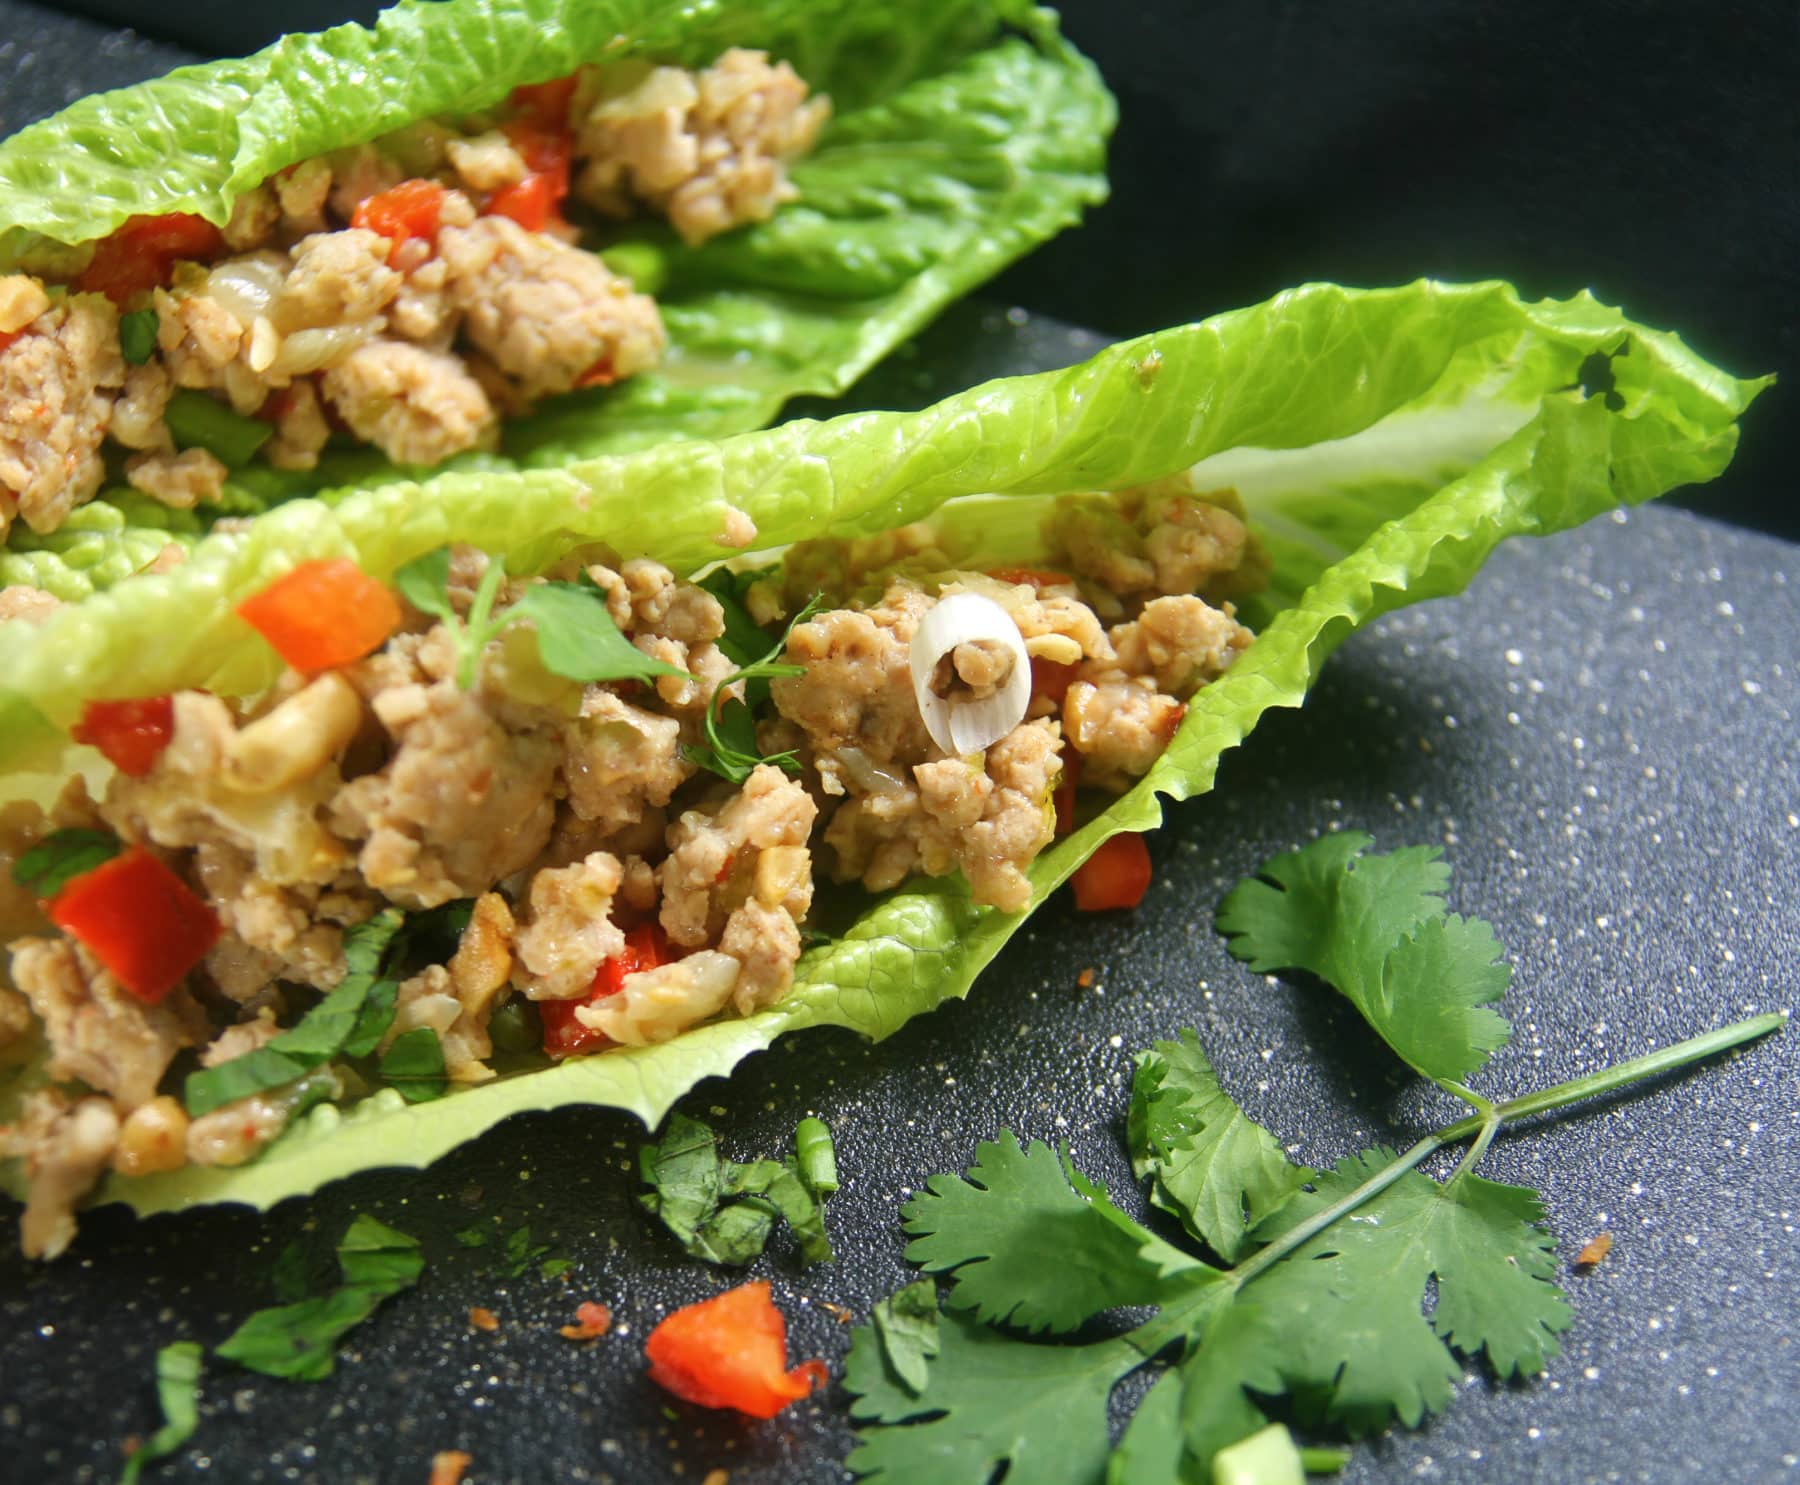
Keto chicken lettuce wraps are a delicious, low-carb dish that’s packed with flavor. Tender ground chicken is stir-fried with ginger, garlic, and sesame oil, then wrapped in crisp lettuce leaves. This meal is perfect for anyone following a keto or low-carb lifestyle, providing a refreshing yet filling option that’s easy to make.


Ingredients

  • 1 lb ground chicken
  • 2 tbsp sesame oil
  • 3 garlic cloves, minced
  • 1 tbsp fresh ginger, grated
  • 1/4 cup soy sauce (or tamari for gluten-free)
  • 1 tbsp rice vinegar
  • 1 tbsp sriracha (optional, for heat)
  • 1 tsp sesame seeds (optional, for garnish)
  • 8 large lettuce leaves (butter lettuce or romaine)
  • 2 green onions, sliced (for garnish)

Instructions

  1. Cook the chicken:
    In a large skillet, heat sesame oil over medium heat. Add the ground chicken and cook until browned, breaking it up into crumbles, about 6-8 minutes.
  2. Add aromatics:
    Stir in the garlic and ginger, cooking for an additional 1-2 minutes until fragrant.
  3. Add sauce:
    Pour in the soy sauce, rice vinegar, and sriracha (if using). Stir to combine and cook for another 2-3 minutes, allowing the sauce to thicken slightly.
  4. Assemble the wraps:
    Lay out the lettuce leaves on a serving plate. Spoon the chicken mixture into each leaf. Garnish with sesame seeds and sliced green onions.
  5. Serve:
    Serve immediately, allowing everyone to wrap the lettuce around the chicken mixture and enjoy.

Prep Time:

10 minutes

Cook Time:

15 minutes

Total Time:

25 minutes


Servings:

Serves 4


Nutritional Information (Per Serving)

  • Calories: 210 kcal
  • Protein: 25g
  • Fat: 12g
  • Saturated Fat: 3g
  • Carbohydrates: 5g
  • Fiber: 1g
  • Sugar: 1g
  • Sodium: 800mg

Additional Information:

Keto chicken lettuce wraps are a satisfying low-carb meal that fits perfectly into ketogenic, paleo, and low-carb diets. The crispness of the lettuce provides a fresh contrast to the savory chicken, making it a light but flavorful option. This dish is versatile and can be served as an appetizer, lunch, or dinner.

Diets:
This dish fits into the following dietary lifestyles:

  • Keto
  • Low-Carb
  • Paleo
  • Gluten-Free
  • Dairy-Free

Cuisine Type:
Asian-Inspired


Notes:

  • Lettuce variety: Butter lettuce works best for wraps due to its flexibility and large leaves, but romaine or iceberg can be used as well.
  • Adjust heat: If you prefer a milder flavor, you can omit the sriracha, or add extra for more spice.

Read More

Miso Glazed Eggplant

Description:
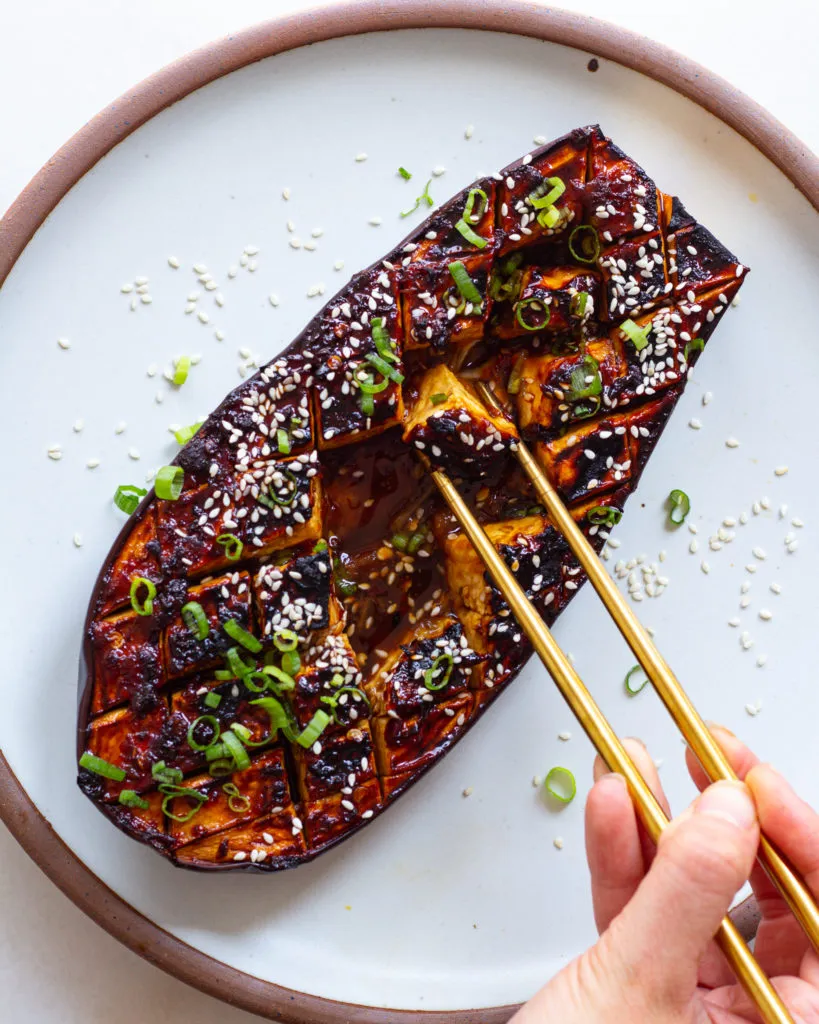
Miso glazed eggplant is a trendy, flavorful dish that brings together the umami-rich flavor of miso with the natural creaminess of roasted eggplant. The dish is caramelized to perfection in the oven, leaving a savory, slightly sweet glaze on the eggplant. This simple yet sophisticated dish is ideal as a main course or a side dish. It’s a quick way to bring bold, Japanese-inspired flavors to your table with minimal effort.


Ingredients

  • 2 large eggplants, halved lengthwise
  • 2 tbsp olive oil
  • 3 tbsp white miso paste
  • 1 tbsp soy sauce
  • 1 tbsp mirin (or rice vinegar)
  • 1 tbsp honey (or maple syrup for vegan)
  • 1 garlic clove, minced
  • 1 tsp sesame oil
  • 1 tsp sesame seeds, for garnish
  • 2 green onions, sliced (for garnish)

Instructions

  1. Preheat the oven:
    Preheat your oven to 400°F (200°C) and line a baking sheet with parchment paper.
  2. Prepare the eggplant:
    Score the flesh of each eggplant half in a crosshatch pattern without cutting through the skin. Brush the eggplants with olive oil and place them cut side up on the baking sheet. Roast in the preheated oven for 25-30 minutes, until the eggplant is soft and golden.
  3. Make the miso glaze:
    While the eggplants are roasting, whisk together the miso paste, soy sauce, mirin, honey (or maple syrup), minced garlic, and sesame oil in a small bowl until smooth.
  4. Glaze the eggplant:
    Remove the eggplant from the oven and brush the miso glaze generously over the cut sides of the roasted eggplants. Return the eggplant to the oven and roast for another 10-12 minutes until the glaze is caramelized and bubbling.
  5. Garnish and serve:
    Once the eggplants are done roasting, remove them from the oven and sprinkle with sesame seeds and sliced green onions. Serve hot as a main dish or side.

Prep Time:

10 minutes

Cook Time:

40 minutes

Total Time:

50 minutes


Servings:

Serves 4


Nutritional Information (Per Serving)

  • Calories: 210 kcal
  • Protein: 4g
  • Fat: 12g
  • Saturated Fat: 2g
  • Carbohydrates: 22g
  • Fiber: 7g
  • Sugar: 10g
  • Sodium: 550mg

Additional Information:

Miso glazed eggplant is inspired by Japanese flavors, making it a popular dish in fusion cuisine. The miso glaze offers a balance of sweet and savory, while roasting the eggplant brings out its creamy texture. This dish is perfect as a plant-based entrée or an elegant side dish.

Diets:
This dish fits into the following dietary lifestyles:

  • Vegan (if using maple syrup)
  • Vegetarian
  • Mediterranean
  • Gluten-Free (if using tamari instead of soy sauce)
  • Low-Carb

When to Serve:
Miso glazed eggplant can be served as a hearty main dish or as a flavorful side to accompany dishes like rice, quinoa, or grilled meats. Its rich flavors and vibrant presentation make it perfect for dinner parties, casual meals, or as a light yet satisfying lunch.


Notes:

  • Choosing the right miso: White miso (shiro miso) is sweeter and milder than red miso, which would give the glaze a stronger, saltier flavor. For this dish, white miso works best.
  • Additional toppings: Try adding fresh herbs like cilantro or drizzle with a touch of chili oil for added spice.

Read More

Poke Bowl

Description:
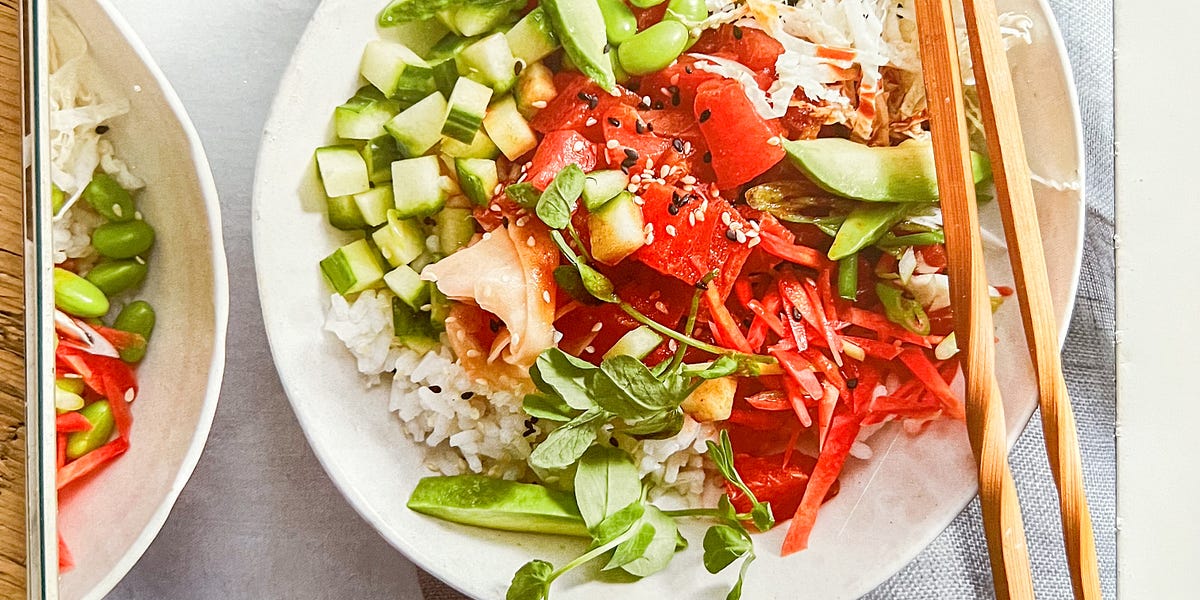
A Poke Bowl is a traditional Hawaiian dish that has taken the global food scene by storm. It’s a fresh, colorful, and customizable dish typically consisting of sushi-grade raw fish, rice, vegetables, and a variety of toppings and sauces. It’s packed with flavor and nutrients, making it a great choice for a healthy, balanced meal. With vibrant ingredients like tuna, avocado, and edamame, this dish is as visually appealing as it is delicious.

Servings:

This recipe serves 4 people.

Ingredients

  • 2 cups cooked sushi rice
  • 1 lb sushi-grade tuna (or salmon), diced
  • 1/4 cup soy sauce
  • 2 tbsp sesame oil
  • 1 tbsp rice vinegar
  • 1 tbsp sesame seeds
  • 1 avocado, diced
  • 1/2 cup edamame, cooked
  • 1/2 cup cucumber, sliced
  • 1/2 cup radishes, thinly sliced
  • 2 green onions, chopped
  • 1/4 cup pickled ginger
  • 1 tbsp sriracha or spicy mayo (optional)
  • 1 sheet nori (seaweed), cut into strips
  • Fresh cilantro or microgreens, for garnish (optional)

Instructions

  1. Prepare the fish:
    In a medium bowl, combine the diced tuna (or salmon) with soy sauce, sesame oil, rice vinegar, and sesame seeds. Gently toss to coat the fish evenly. Set aside to marinate for 10-15 minutes.
  2. Assemble the bowls:
    Divide the cooked sushi rice into four bowls. Arrange the marinated fish, avocado, edamame, cucumber, radishes, green onions, and pickled ginger on top of the rice.
  3. Add toppings:
    Drizzle with sriracha or spicy mayo if desired, and garnish with nori strips and fresh cilantro or microgreens.
  4. Serve:
    Serve immediately, allowing everyone to mix the ingredients as they eat. Poke bowls are best enjoyed fresh.

Nutritional Information (Per Serving)

  • Calories: 450 kcal
  • Protein: 27g
  • Fat: 18g
  • Saturated Fat: 3g
  • Carbohydrates: 47g
  • Fiber: 6g
  • Sugar: 3g
  • Sodium: 750mg

Additional Information:

Why Poke Bowls?
Poke bowls are trending globally due to their fresh, customizable nature and their combination of healthy ingredients. Traditionally from Hawaii, poke bowls have become a symbol of fusion cuisine, blending the flavors of the Pacific Islands with Japanese sushi culture. It’s a perfect balance of protein, carbs, and fats, with plenty of room for creativity.

Diets:
This dish fits into a variety of dietary lifestyles:

  • Pescatarian
  • Gluten-Free (if using tamari or gluten-free soy sauce)
  • Dairy-Free
  • Mediterranean
  • Low-Carb (if served with cauliflower rice or less rice)
  • High-Protein

Customizing Your Poke Bowl:
Poke bowls are incredibly versatile, allowing you to mix and match ingredients to suit your personal taste. You can swap out tuna for salmon or tofu for a vegetarian version. Other popular toppings include mango, pineapple, jalapeños, or even seaweed salad. The combination of raw fish with fresh vegetables and rice makes it both a nutrient-packed meal and a visually stunning dish.

Health Benefits of Poke Bowls:
Poke bowls are rich in healthy fats from the fish and avocado, fiber from the vegetables, and protein from the fish or tofu. The inclusion of edamame and other plant-based ingredients can further boost the nutritional content. Additionally, tuna and salmon are excellent sources of omega-3 fatty acids, which are known to support heart and brain health.

When to Enjoy a Poke Bowl:
Poke bowls are ideal for lunch or dinner and can be made in advance for meal prepping. They’re particularly refreshing in the summer, but they can be enjoyed year-round. The raw fish is the star of the dish, so make sure to use the freshest sushi-grade fish available.

Notes:

  • Fish freshness: Be sure to purchase sushi-grade tuna or salmon from a reputable source, as this dish features raw fish.
  • Vegan option: For a plant-based poke bowl, swap the fish for tofu or marinated tempeh, and add extra veggies like carrots or seaweed salad.
  • Meal prep: While poke bowls are best when fresh, you can prepare the rice, veggies, and sauces ahead of time. Wait until just before serving to cut and add the fish.

This Poke Bowl recipe is a healthy, trendy, and colorful meal that’s both easy to customize and full of flavor. With fresh fish, vibrant vegetables, and a variety of tasty toppings, it’s sure to become a favorite for anyone looking for a delicious, balanced meal.

Read More

Kimchi Fried Rice (Kimchi Bokkeumbap)

Description:
Kimchi Fried Rice, or Kimchi Bokkeumbap, is a flavorful, spicy, and tangy Korean dish that’s quick and easy to prepare. It’s made by stir-frying leftover rice with kimchi, vegetables, and often a protein like eggs or pork. This one-pan meal is perfect for a quick lunch or dinner, and it taps into the rising popularity of Korean cuisine worldwide.

Kimchi, a traditional fermented vegetable dish (usually made with cabbage), adds a unique tang and heat to the fried rice, making this dish a go-to comfort food with probiotic benefits.

Servings:

This recipe serves 4 people.

Ingredients

  • 3 cups cooked and cooled rice (preferably day-old)
  • 1 1/2 cups kimchi, chopped, with 1/4 cup kimchi juice
  • 2 tbsp sesame oil
  • 1 onion, finely chopped
  • 2 garlic cloves, minced
  • 1/2 cup carrots, diced
  • 2 tbsp gochujang (Korean chili paste)
  • 1 tbsp soy sauce
  • 1 tsp sugar
  • 2 eggs, fried (optional, for topping)
  • 2 green onions, sliced (for garnish)
  • 1 tbsp toasted sesame seeds (for garnish)
  • 1 tbsp vegetable oil (for frying)

Instructions

  1. Prepare the rice:
    Use day-old, cold rice for the best results. If you don’t have leftover rice, cook the rice and spread it on a baking sheet to cool quickly.
  2. Cook the aromatics:
    Heat the vegetable oil in a large skillet or wok over medium heat. Add the chopped onions and carrots, and sauté for 3-4 minutes until softened. Add the minced garlic and cook for another minute until fragrant.
  3. Stir-fry the kimchi:
    Add the chopped kimchi to the skillet and stir-fry for about 3-4 minutes, allowing the kimchi to release its flavor and moisture.
  4. Add the rice:
    Add the cold rice to the skillet and break it up with a spatula. Stir-fry everything together for about 5 minutes, making sure the rice is heated through.
  5. Season the rice:
    Stir in the gochujang, soy sauce, sugar, and kimchi juice. Toss everything together to evenly coat the rice with the sauce.
  6. Finish and garnish:
    Turn off the heat and drizzle sesame oil over the fried rice. Garnish with sliced green onions and toasted sesame seeds. For added richness, top each serving with a fried egg if desired.

Nutritional Information (Per Serving, without egg)

  • Calories: 320 kcal
  • Protein: 6g
  • Fat: 10g
  • Saturated Fat: 1.5g
  • Carbohydrates: 48g
  • Fiber: 4g
  • Sugar: 6g
  • Sodium: 780mg

Additional Information:

Why Kimchi Fried Rice?
Kimchi Fried Rice is a fantastic way to use up leftover rice and kimchi, making it an economical and sustainable meal. Beyond its practicality, this dish is packed with flavor—thanks to the tangy, spicy kimchi and umami-rich gochujang. It’s a great introduction to Korean cuisine for beginners and a beloved comfort food for those already familiar with it.

Health Benefits of Kimchi:
Kimchi is rich in probiotics due to its fermentation process, which can support digestive health. It’s also packed with vitamins A, B, and C, as well as antioxidants. Adding kimchi to your meals can be a simple and delicious way to boost your gut health and nutrient intake.

Meal Prep and Storage:
Kimchi Fried Rice is a perfect meal prep option because it stores well in the fridge for up to 3 days. To reheat, simply warm it up in a skillet with a little oil to retain its crispy texture. If you’re planning to store it, hold off on adding the fried egg until you’re ready to serve.

Customization Options:
This dish is highly versatile. You can add any protein you like, such as tofu for a vegan option, or bacon or ham for a richer flavor. For extra vegetables, throw in bell peppers, peas, or spinach. If you prefer milder heat, reduce the amount of gochujang or use a mild chili paste instead.

Dietary Adjustments:
To make this dish vegan, simply omit the fried egg and ensure the kimchi and gochujang you’re using are vegan-friendly. Many traditional brands of kimchi and gochujang may contain seafood ingredients, but there are plenty of plant-based versions available in stores.

Notes:

  • Rice texture tip: Day-old rice works best because it’s drier and doesn’t clump together. If you’re using freshly cooked rice, cool it down quickly by spreading it on a baking sheet or refrigerating it for a bit.
  • Serving suggestion: Kimchi Fried Rice pairs well with a side of pickled radishes or a light cucumber salad for added freshness.

This Kimchi Fried Rice is an easy and flavorful dish that brings together the bold, tangy flavors of Korean cuisine. Whether enjoyed as a quick meal or a side dish, it’s a versatile and satisfying option for any occasion.

Read More