Author: Admin

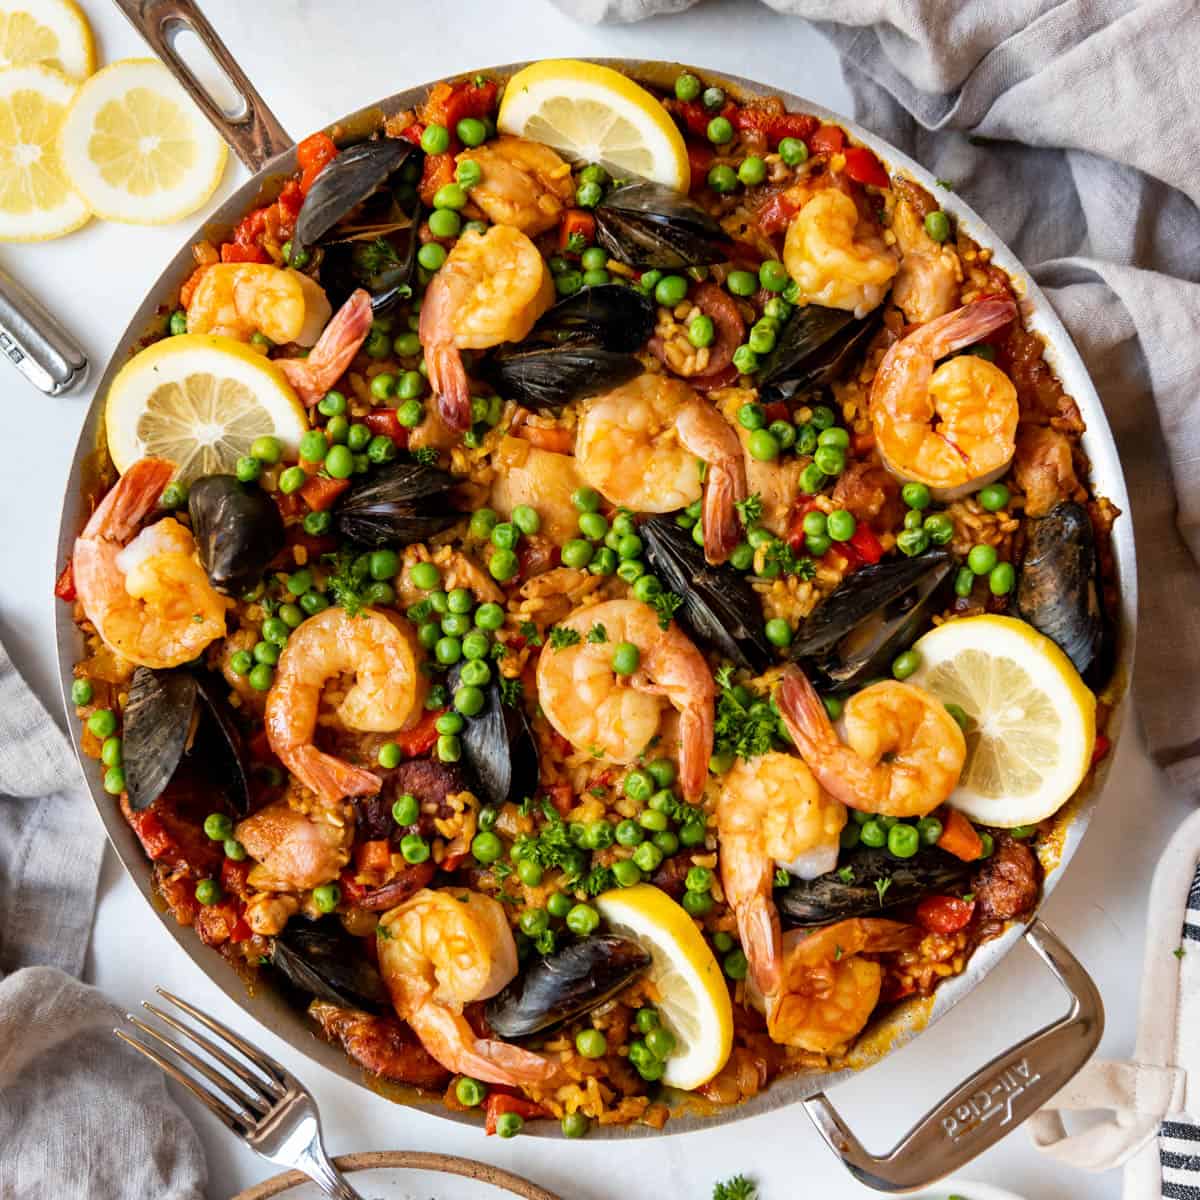
Traditional Spanish Paella

Description:
Paella is a classic Spanish dish that originated in Valencia. It’s a one-pan meal, traditionally made with rice, saffron, seafood, and a variety of vegetables and meats. Paella is known for its beautiful golden hue from saffron and its rich layers of flavor. This dish is perfect for family gatherings, as it brings people together around the pan for a hearty and delicious meal. It’s typically cooked in a wide, shallow pan, but a large skillet will also work if you don’t have a traditional paella pan.


Ingredients

  • 2 tbsp olive oil
  • 1 onion, finely chopped
  • 4 garlic cloves, minced
  • 1 red bell pepper, chopped
  • 1 green bell pepper, chopped
  • 2 tomatoes, grated or finely chopped
  • 1 1/2 cups Bomba or Arborio rice
  • 1/4 tsp saffron threads (soaked in 2 tbsp warm water)
  • 4 cups chicken or vegetable broth
  • 1/2 lb shrimp, peeled and deveined
  • 1/2 lb mussels, scrubbed and debearded
  • 1/2 lb chicken thighs, boneless and skinless, cut into chunks
  • 1/4 cup frozen peas
  • 1 tsp smoked paprika
  • Salt and pepper, to taste
  • 1 lemon, cut into wedges (for serving)
  • Fresh parsley, chopped (for garnish)

Instructions

  1. Sauté the vegetables:
    Heat the olive oil in a large paella pan or skillet over medium heat. Add the chopped onion, garlic, and bell peppers. Sauté for 5-7 minutes until softened.
  2. Cook the chicken:
    Add the chicken pieces to the pan and season with salt, pepper, and smoked paprika. Sauté for 5 minutes until the chicken is browned on all sides.
  3. Add the tomatoes and rice:
    Stir in the grated tomatoes and cook for another 3 minutes. Then add the rice, stirring to coat the rice grains with the oil and tomato mixture.
  4. Add broth and saffron:
    Pour in the chicken broth, saffron threads (along with the water they were soaked in), and a pinch of salt. Bring the mixture to a boil, then reduce the heat to low. Simmer uncovered for 15 minutes, stirring occasionally.
  5. Add seafood and peas:
    Nestle the shrimp, mussels, and peas into the rice mixture. Cover the pan with a lid or foil and cook for an additional 10 minutes, or until the seafood is cooked through, the mussels have opened, and the rice is tender. Discard any mussels that do not open.
  6. Rest and serve:
    Remove the paella from heat and let it rest, covered, for 5 minutes. Garnish with fresh parsley and lemon wedges before serving.

Prep Time:

15 minutes

Cook Time:

40 minutes

Total Time:

55 minutes


Servings:

Serves 4


Nutritional Information (Per Serving)

  • Calories: 480 kcal
  • Protein: 33g
  • Fat: 18g
  • Saturated Fat: 4g
  • Carbohydrates: 45g
  • Fiber: 4g
  • Sugar: 5g
  • Sodium: 950mg

Additional Information:

Paella is more than just a dish; it’s a symbol of Spanish culture, especially in Valencia, where it originated. There are many variations of paella, including seafood, meat, and vegetarian versions. What makes paella unique is the special rice used—Bomba rice, which absorbs flavors well while maintaining its texture. A proper paella also forms a socarrat, a crispy, caramelized layer of rice at the bottom of the pan, which is considered the best part.

Diets:
This dish fits into the following dietary lifestyles:

  • Mediterranean
  • Gluten-Free
  • Paleo (if grains are omitted, though the traditional dish is not grain-free)
  • Low-Carb (depending on portion size and ingredients)

Notes:

  • Rice choice: For the best texture, use Bomba rice, a traditional short-grain rice used in paella. If it’s not available, Arborio rice is a good substitute, though the cooking time may vary.
  • Seafood substitution: You can substitute clams or calamari for the mussels or add chorizo for a meatier flavor profile.
  • Saffron: While saffron gives paella its iconic yellow color and unique flavor, you can use a small pinch of turmeric as a budget-friendly substitute, although it won’t have the same depth of flavor.

This Traditional Spanish Paella is a hearty and flavorful dish that’s perfect for a weekend gathering or family meal. Its combination of seafood, chicken, and savory rice makes it a satisfying one-pan meal.

Read More

Whipped Feta with Honey and Herbs

Description:
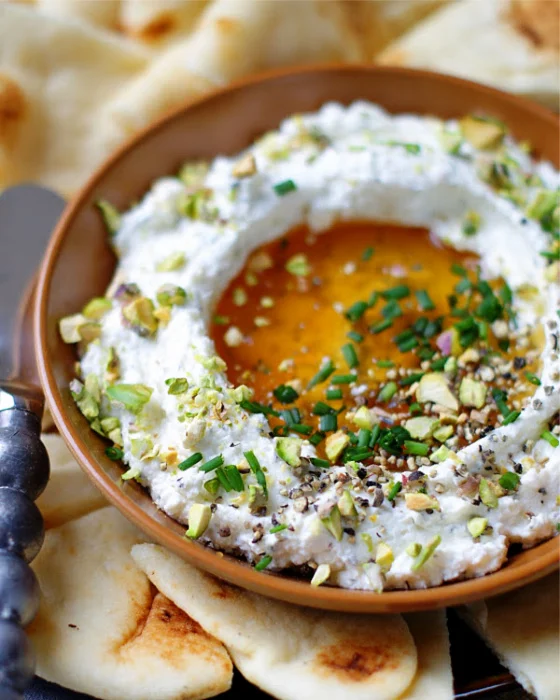
Whipped feta is a delicious and trending appetizer that combines the tanginess of feta cheese with the sweetness of honey and fresh herbs. Creamy, salty, and slightly sweet, this dish is perfect for spreading on toast or serving with vegetables or crackers. It’s a popular dish in Mediterranean cuisine and is incredibly easy to make, offering an impressive flavor profile with minimal effort.


Ingredients

  • 8 oz feta cheese, crumbled
  • 1/4 cup Greek yogurt
  • 2 tbsp olive oil
  • 1 tbsp fresh lemon juice
  • 1 tbsp honey (plus more for drizzling)
  • 1 tsp fresh thyme (or any fresh herbs like rosemary, oregano)
  • Salt and pepper, to taste
  • Fresh parsley, chopped (for garnish)
  • Crusty bread, crackers, or vegetable sticks (for serving)

Instructions

  1. Whip the feta:
    In a food processor or blender, combine the feta cheese, Greek yogurt, olive oil, and lemon juice. Blend until smooth and creamy, scraping down the sides as needed.
  2. Add honey and herbs:
    Add the honey and fresh thyme to the mixture. Pulse until combined. Season with salt and pepper to taste.
  3. Serve:
    Transfer the whipped feta to a serving bowl. Drizzle with additional honey and garnish with fresh parsley and more herbs if desired. Serve with crusty bread, crackers, or vegetable sticks.

Prep Time:

10 minutes

Cook Time:

N/A

Total Time:

10 minutes


Servings:

Serves 4


Nutritional Information (Per Serving)

  • Calories: 220 kcal
  • Protein: 7g
  • Fat: 18g
  • Saturated Fat: 7g
  • Carbohydrates: 6g
  • Fiber: 0g
  • Sugar: 5g
  • Sodium: 420mg

Additional Information:

Whipped feta has gained popularity due to its versatility and rich, tangy flavor. It’s a staple in Mediterranean cuisine, where it’s often paired with olives, honey, or fresh herbs. The smooth, spreadable texture of the feta makes it ideal for serving as a dip or spread at parties, dinners, or casual get-togethers. The combination of creamy feta, sweet honey, and aromatic herbs creates a balance of flavors that are both bold and refreshing.

Diets:
This dish fits into the following dietary lifestyles:

  • Vegetarian
  • Mediterranean
  • Gluten-Free (if served with gluten-free crackers or vegetables)
  • Low-Carb

Notes:

  • Cheese consistency: The texture of the whipped feta can vary based on the type of feta cheese you use. For a creamier texture, add more Greek yogurt or a splash of olive oil.
  • Serving suggestions: Serve the whipped feta alongside a mezze platter with olives, roasted vegetables, and pita chips for an authentic Mediterranean experience.
  • Storage: Store any leftovers in an airtight container in the refrigerator for up to 3 days.

This recipe for Whipped Feta with Honey and Herbs offers a creamy, savory, and slightly sweet spread perfect for any gathering or snack.

Read More

Poke Bowl

Description:
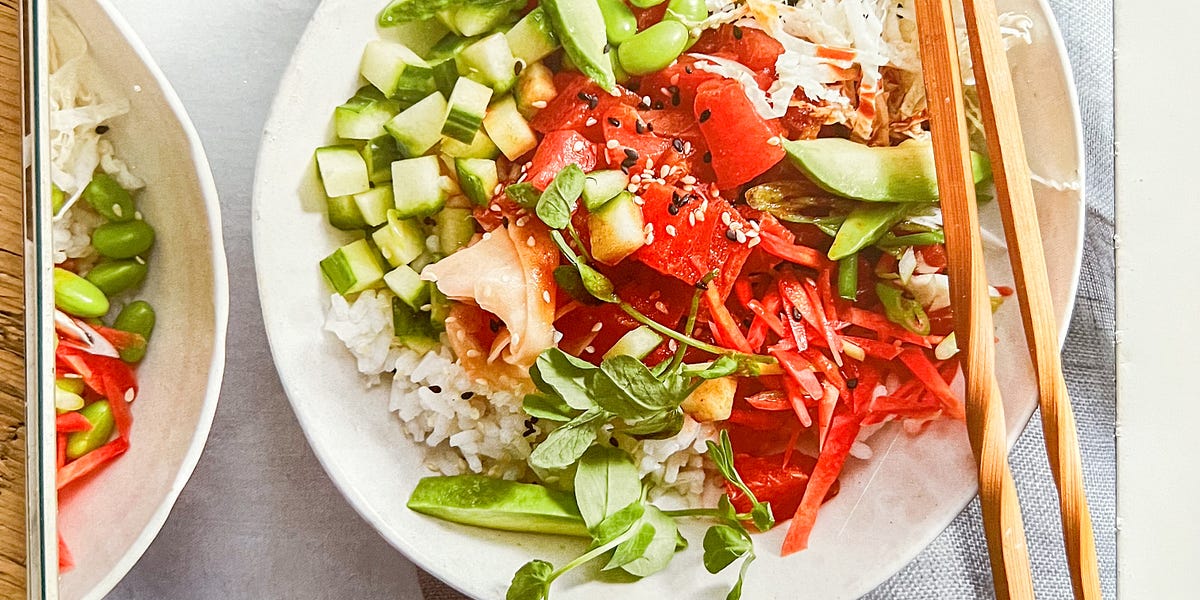
A Poke Bowl is a traditional Hawaiian dish that has taken the global food scene by storm. It’s a fresh, colorful, and customizable dish typically consisting of sushi-grade raw fish, rice, vegetables, and a variety of toppings and sauces. It’s packed with flavor and nutrients, making it a great choice for a healthy, balanced meal. With vibrant ingredients like tuna, avocado, and edamame, this dish is as visually appealing as it is delicious.

Servings:

This recipe serves 4 people.

Ingredients

  • 2 cups cooked sushi rice
  • 1 lb sushi-grade tuna (or salmon), diced
  • 1/4 cup soy sauce
  • 2 tbsp sesame oil
  • 1 tbsp rice vinegar
  • 1 tbsp sesame seeds
  • 1 avocado, diced
  • 1/2 cup edamame, cooked
  • 1/2 cup cucumber, sliced
  • 1/2 cup radishes, thinly sliced
  • 2 green onions, chopped
  • 1/4 cup pickled ginger
  • 1 tbsp sriracha or spicy mayo (optional)
  • 1 sheet nori (seaweed), cut into strips
  • Fresh cilantro or microgreens, for garnish (optional)

Instructions

  1. Prepare the fish:
    In a medium bowl, combine the diced tuna (or salmon) with soy sauce, sesame oil, rice vinegar, and sesame seeds. Gently toss to coat the fish evenly. Set aside to marinate for 10-15 minutes.
  2. Assemble the bowls:
    Divide the cooked sushi rice into four bowls. Arrange the marinated fish, avocado, edamame, cucumber, radishes, green onions, and pickled ginger on top of the rice.
  3. Add toppings:
    Drizzle with sriracha or spicy mayo if desired, and garnish with nori strips and fresh cilantro or microgreens.
  4. Serve:
    Serve immediately, allowing everyone to mix the ingredients as they eat. Poke bowls are best enjoyed fresh.

Nutritional Information (Per Serving)

  • Calories: 450 kcal
  • Protein: 27g
  • Fat: 18g
  • Saturated Fat: 3g
  • Carbohydrates: 47g
  • Fiber: 6g
  • Sugar: 3g
  • Sodium: 750mg

Additional Information:

Why Poke Bowls?
Poke bowls are trending globally due to their fresh, customizable nature and their combination of healthy ingredients. Traditionally from Hawaii, poke bowls have become a symbol of fusion cuisine, blending the flavors of the Pacific Islands with Japanese sushi culture. It’s a perfect balance of protein, carbs, and fats, with plenty of room for creativity.

Diets:
This dish fits into a variety of dietary lifestyles:

  • Pescatarian
  • Gluten-Free (if using tamari or gluten-free soy sauce)
  • Dairy-Free
  • Mediterranean
  • Low-Carb (if served with cauliflower rice or less rice)
  • High-Protein

Customizing Your Poke Bowl:
Poke bowls are incredibly versatile, allowing you to mix and match ingredients to suit your personal taste. You can swap out tuna for salmon or tofu for a vegetarian version. Other popular toppings include mango, pineapple, jalapeños, or even seaweed salad. The combination of raw fish with fresh vegetables and rice makes it both a nutrient-packed meal and a visually stunning dish.

Health Benefits of Poke Bowls:
Poke bowls are rich in healthy fats from the fish and avocado, fiber from the vegetables, and protein from the fish or tofu. The inclusion of edamame and other plant-based ingredients can further boost the nutritional content. Additionally, tuna and salmon are excellent sources of omega-3 fatty acids, which are known to support heart and brain health.

When to Enjoy a Poke Bowl:
Poke bowls are ideal for lunch or dinner and can be made in advance for meal prepping. They’re particularly refreshing in the summer, but they can be enjoyed year-round. The raw fish is the star of the dish, so make sure to use the freshest sushi-grade fish available.

Notes:

  • Fish freshness: Be sure to purchase sushi-grade tuna or salmon from a reputable source, as this dish features raw fish.
  • Vegan option: For a plant-based poke bowl, swap the fish for tofu or marinated tempeh, and add extra veggies like carrots or seaweed salad.
  • Meal prep: While poke bowls are best when fresh, you can prepare the rice, veggies, and sauces ahead of time. Wait until just before serving to cut and add the fish.

This Poke Bowl recipe is a healthy, trendy, and colorful meal that’s both easy to customize and full of flavor. With fresh fish, vibrant vegetables, and a variety of tasty toppings, it’s sure to become a favorite for anyone looking for a delicious, balanced meal.

Read More

Shakshuka (Eggs Poached in Spicy Tomato Sauce)

Description:
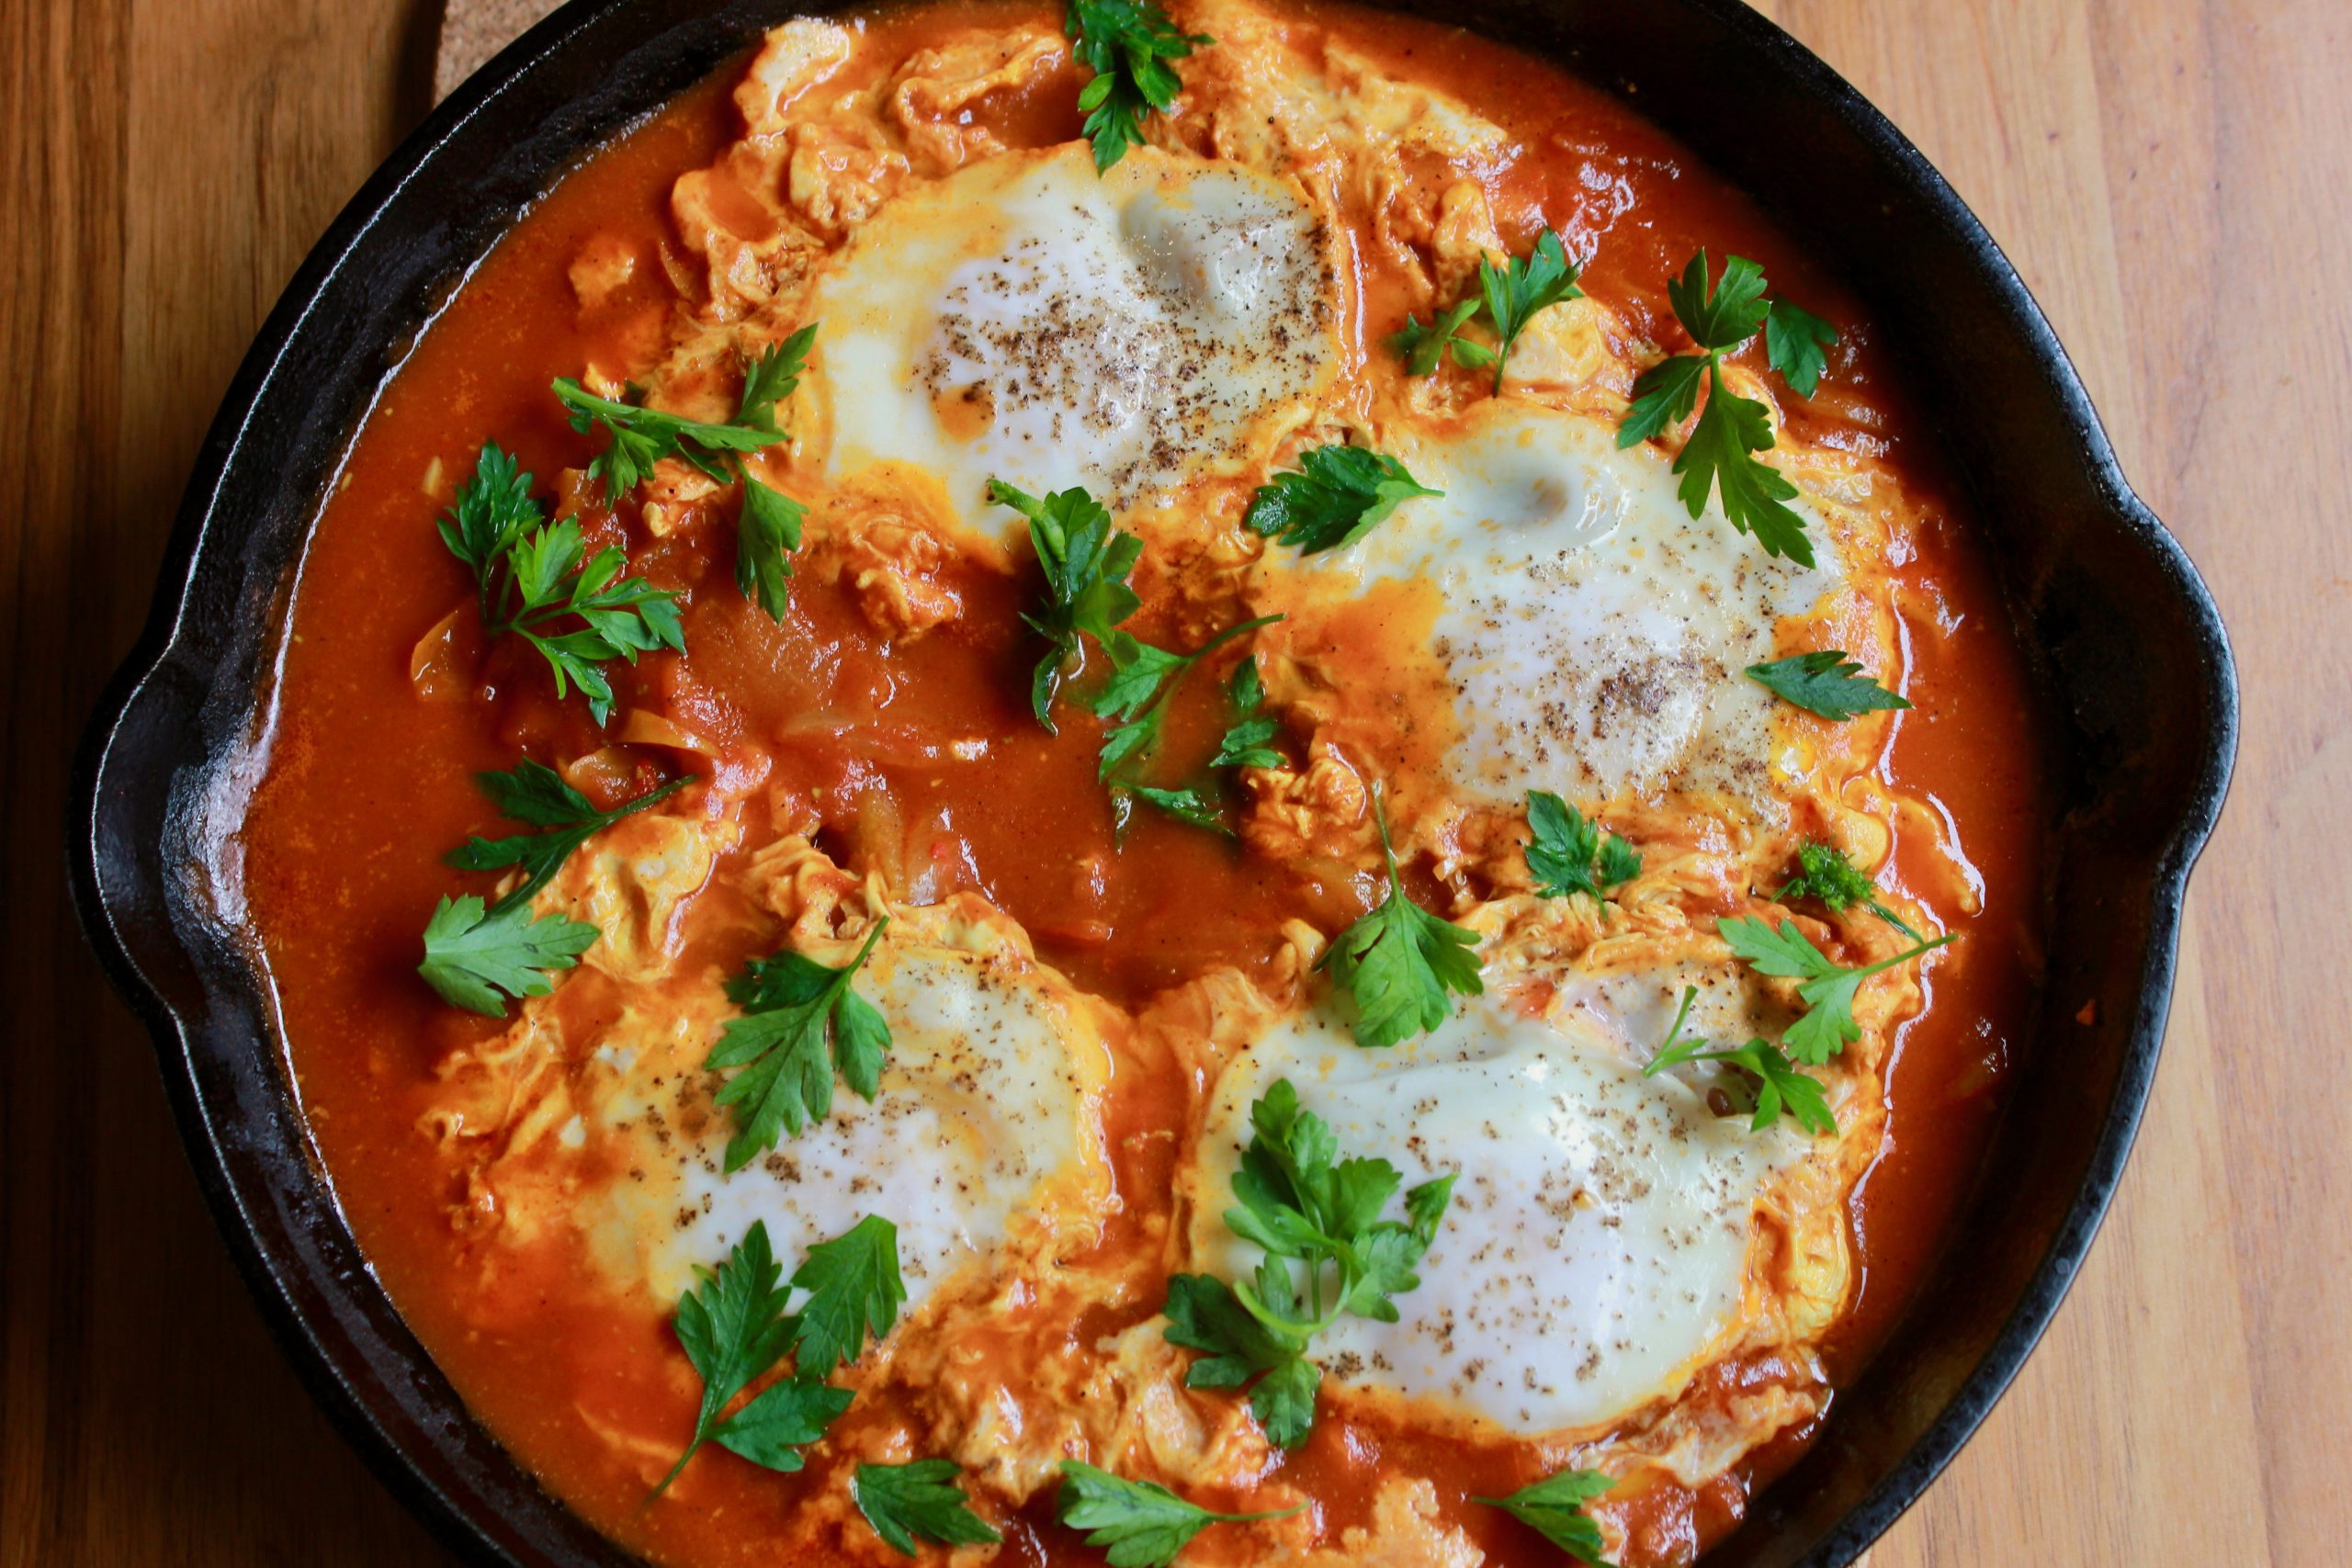
Shakshuka is a vibrant, flavorful dish that hails from North Africa and the Middle East. It consists of eggs poached in a spiced tomato and bell pepper sauce, seasoned with cumin, paprika, and chili for a warm, smoky flavor. Shakshuka is typically enjoyed as a hearty breakfast or brunch but is versatile enough for any meal of the day. It’s perfect for a shared meal and is often served with crusty bread for dipping.

Servings:

This recipe serves 4 people.

Ingredients

  • 2 tbsp olive oil
  • 1 large onion, finely chopped
  • 1 red bell pepper, diced
  • 3 garlic cloves, minced
  • 1 tsp ground cumin
  • 1 tsp smoked paprika
  • 1/4 tsp chili powder (optional, for heat)
  • 1 can (28 oz) crushed tomatoes
  • Salt and black pepper, to taste
  • 4 large eggs
  • 1/4 cup fresh parsley or cilantro, chopped (for garnish)
  • Crusty bread, for serving (optional)

Instructions

  1. Sauté the vegetables:
    Heat the olive oil in a large skillet over medium heat. Add the chopped onion and red bell pepper, and sauté for about 5-7 minutes, until softened.
  2. Add garlic and spices:
    Stir in the minced garlic, cumin, smoked paprika, and chili powder (if using). Cook for about 1 minute until fragrant.
  3. Cook the tomato sauce:
    Pour the crushed tomatoes into the skillet, season with salt and pepper, and simmer the sauce for 10-15 minutes, allowing it to thicken slightly.
  4. Poach the eggs:
    Make four small wells in the sauce and crack an egg into each well. Cover the skillet with a lid and cook for 5-7 minutes, or until the eggs are set to your desired doneness (for runny yolks, cook for less time).
  5. Garnish and serve:
    Remove from heat and garnish with chopped parsley or cilantro. Serve the shakshuka directly from the skillet with crusty bread on the side for dipping.

Nutritional Information (Per Serving)

  • Calories: 220 kcal
  • Protein: 10g
  • Fat: 13g
  • Saturated Fat: 3g
  • Carbohydrates: 16g
  • Fiber: 4g
  • Sugar: 10g
  • Sodium: 580mg

Additional Information:

The Cultural Popularity of Shakshuka:
Shakshuka has been a staple in North African and Middle Eastern cuisine for generations, but it’s gained worldwide popularity due to its simplicity, bold flavors, and versatility. It’s commonly enjoyed as a brunch dish in cafes across the globe, but its ingredients are accessible and affordable, making it perfect for home cooking as well. The tomato-based sauce is warmly spiced, and the eggs make it both nutritious and filling. The communal aspect of eating shakshuka directly from the skillet with bread makes it a favorite for family meals and social gatherings.

Diets:
This dish fits into a variety of dietary lifestyles:

  • Vegetarian
  • Mediterranean
  • Gluten-Free (if served without bread)
  • Paleo
  • Low-Carb

When to Serve Shakshuka:
Shakshuka is commonly served for breakfast or brunch but is also a great option for a quick and easy dinner. It can be paired with a side of fresh salad or simply eaten with bread. The recipe is adaptable and can be adjusted for larger groups by increasing the number of eggs and using a larger skillet. It’s a one-pan meal that’s visually appealing, satisfying, and incredibly flavorful.

Notes:

  • Spice level: You can adjust the chili powder for more or less heat depending on your taste preference.
  • Egg doneness: Cook the eggs to your liking—some prefer runny yolks, while others may want their eggs fully cooked through.
  • Garnish options: While parsley or cilantro are the traditional garnishes, you can also add crumbled feta or a dollop of Greek yogurt for extra richness.

This Shakshuka recipe is an easy, nutritious, and flavor-packed meal that is perfect for breakfast, brunch, or dinner. The combination of eggs poached in a spiced tomato sauce makes it a comforting yet vibrant dish that is sure to become a favorite in any household.

Read More

Turmeric Golden Milk (Golden Latte)

Description:
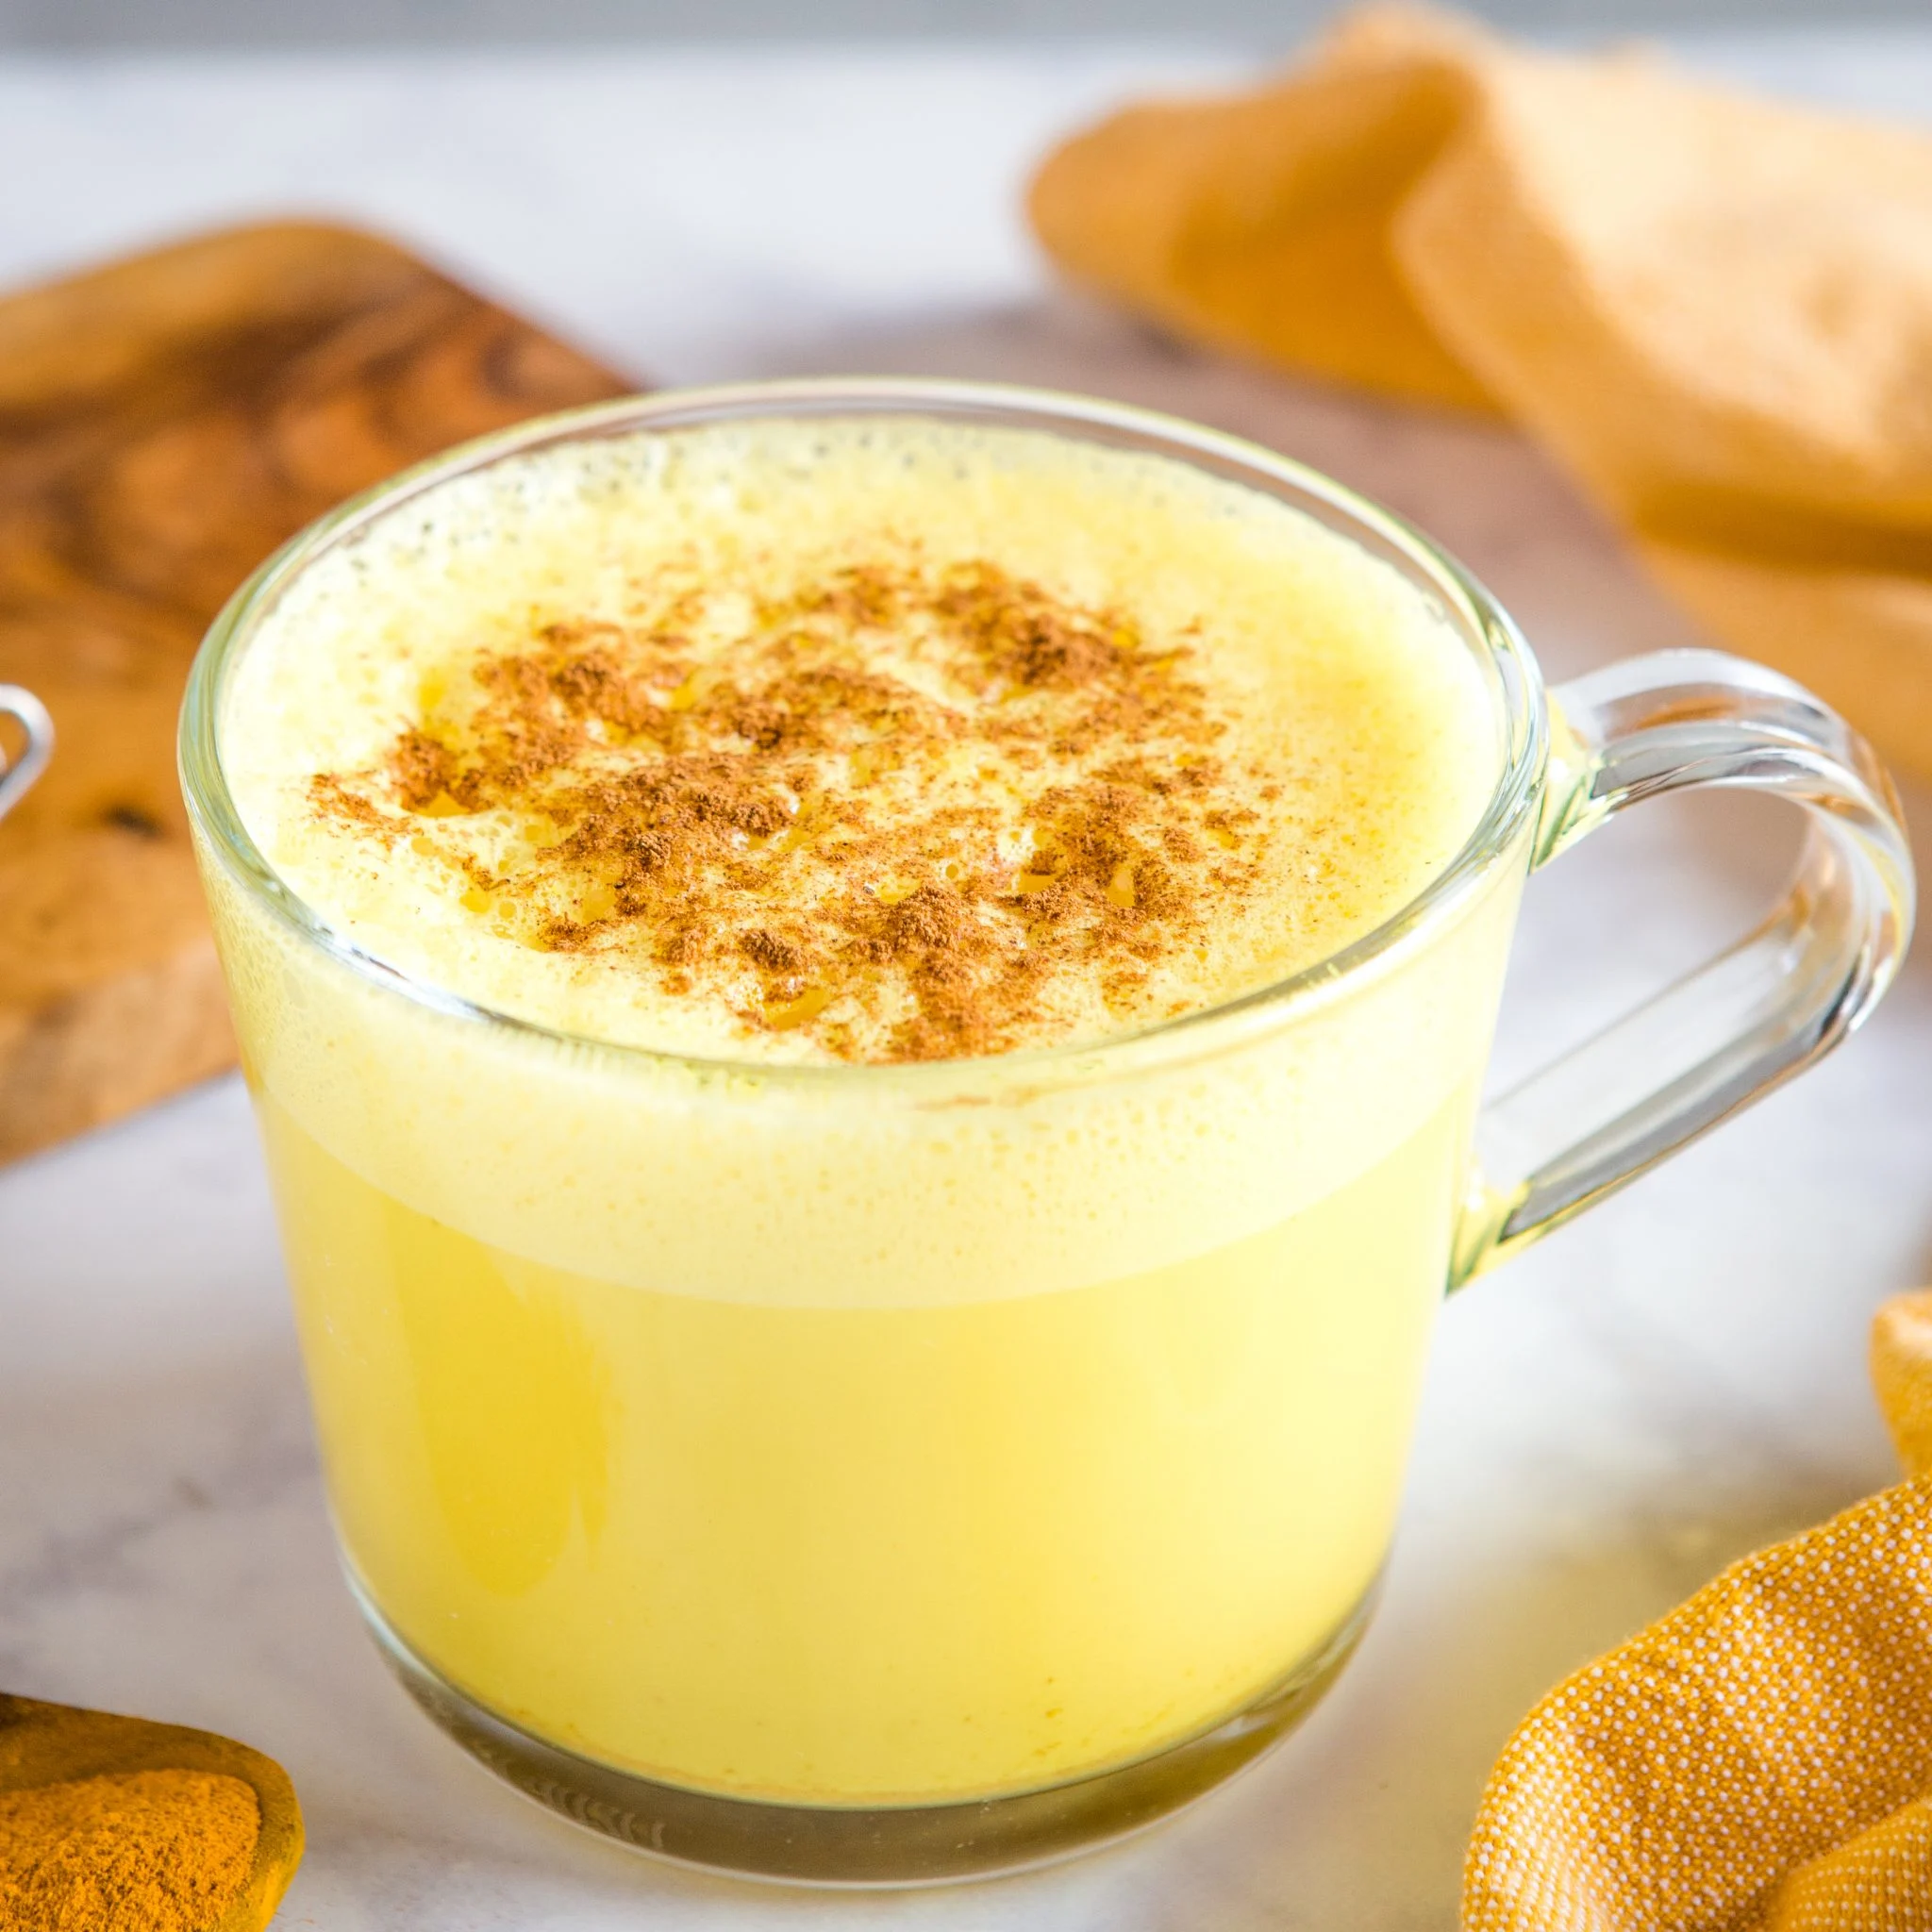
Turmeric Golden Milk, also known as a Golden Latte, is a warm, comforting, and healthy drink made with turmeric, which gives it its golden hue. It’s packed with anti-inflammatory properties and antioxidants, making it a perfect drink to relax and promote overall wellness. The combination of turmeric, ginger, and cinnamon adds warmth and flavor, while honey or maple syrup balances the earthy spices with a touch of sweetness. This trendy drink has been embraced by those looking for holistic and natural remedies for inflammation and immunity support.

Servings:

This recipe serves 2 people.

Ingredients

  • 2 cups unsweetened almond milk (or any milk of choice)
  • 1 tsp ground turmeric
  • 1/2 tsp ground cinnamon
  • 1/2 tsp ground ginger (or 1 tsp fresh ginger, grated)
  • 1/4 tsp black pepper (helps with absorption of curcumin in turmeric)
  • 1 tsp coconut oil (optional, for added creaminess and healthy fats)
  • 1 tbsp honey or maple syrup (optional)
  • 1/2 tsp vanilla extract (optional)
  • Ground cinnamon, for garnish

Instructions

  1. Warm the milk:
    In a small saucepan, heat the almond milk over medium heat until hot but not boiling.
  2. Whisk in the spices:
    Whisk in the turmeric, cinnamon, ginger, black pepper, coconut oil (if using), and vanilla extract (if using). Stir continuously until everything is well combined and the milk is warm and fragrant, about 3-4 minutes.
  3. Sweeten and serve:
    Remove from heat and stir in honey or maple syrup to taste, if desired. Pour into mugs and sprinkle with a dash of ground cinnamon on top.
  4. Optional: Froth the milk
    If you prefer a frothy texture, you can use a milk frother or blender to blend the mixture for 20-30 seconds until foamy.

Nutritional Information (Per Serving)

  • Calories: 110 kcal
  • Protein: 2g
  • Fat: 5g
  • Saturated Fat: 2.5g
  • Carbohydrates: 15g
  • Fiber: 2g
  • Sugar: 7g
  • Sodium: 150mg

Additional Information:

Health Benefits of Turmeric Golden Milk:
Turmeric Golden Milk is not only trendy but also a powerhouse of health benefits. Turmeric is known for its anti-inflammatory and antioxidant properties, thanks to its active compound curcumin. When paired with black pepper, curcumin absorption is significantly enhanced. The combination of turmeric, ginger, and cinnamon helps reduce inflammation, improve digestion, and support immune function. This warm drink is often enjoyed as a caffeine-free alternative to coffee or tea, providing a cozy, soothing effect.

Diets:
This recipe fits into a variety of dietary lifestyles, including:

  • Vegan: When made with almond milk or any plant-based milk and sweetened with maple syrup.
  • Vegetarian
  • Paleo: Use full-fat coconut milk and omit the sweeteners or use natural ones like maple syrup.
  • Mediterranean: Focuses on anti-inflammatory ingredients like turmeric and healthy fats from coconut oil.
  • Keto: Use full-fat coconut milk and avoid the sweeteners, or use a keto-friendly sweetener like stevia.
  • Gluten-Free: Naturally gluten-free.
  • Dairy-Free: When made with almond milk or any plant-based milk.
  • Low-Carb: With minimal carbs from the unsweetened almond milk and optional honey.

Customization Options:
Golden Milk can be customized in several ways. For a richer, creamier drink, substitute half of the almond milk with coconut milk. You can also add other spices like cardamom or nutmeg for extra warmth. For those who want an immune boost, add a small pinch of ground cayenne pepper. The drink can be enjoyed warm, but during the summer months, it’s just as delicious served cold over ice.

When to Enjoy:
Golden Milk is perfect for any time of day, but it’s especially popular as a soothing bedtime drink due to its relaxing properties. It’s caffeine-free, making it a great choice for those looking to cut back on coffee or tea. It can also be enjoyed in the morning to start your day with a dose of anti-inflammatory goodness.

Notes:

  • Storage: You can store any leftover golden milk in the refrigerator for up to 3 days. Reheat before serving and stir well, as the spices may settle.
  • Curcumin absorption: Don’t skip the black pepper—it helps your body absorb curcumin, the active compound in turmeric, more effectively.
  • Sweeteners: Adjust the sweetness to your liking, or omit it entirely for a sugar-free version.

This Turmeric Golden Milk is a comforting, health-boosting drink that’s been embraced by wellness communities and health enthusiasts around the world. It’s easy to make, packed with flavor, and offers a range of health benefits to support overall well-being.

Read More

Baked Oats

Description:
Baked oats have become a social media sensation, especially on TikTok, for their ease, versatility, and dessert-like texture while being a healthy breakfast option. Essentially, it’s a nutritious oatmeal turned into a cake-like treat that can be customized with various flavors and toppings. This single-serve baked oats recipe is perfect for breakfast or a snack, and it’s packed with fiber, healthy fats, and a satisfying sweetness.

Servings:

This recipe makes 1 serving.

Ingredients

  • 1/2 cup rolled oats
  • 1/2 ripe banana
  • 1 egg (or flax egg for vegan)
  • 1/4 cup almond milk (or any milk of choice)
  • 1 tbsp maple syrup or honey
  • 1/2 tsp baking powder
  • 1/4 tsp vanilla extract
  • Pinch of salt
  • Optional mix-ins: 1 tbsp chocolate chips, berries, or nuts
  • Toppings: Peanut butter, yogurt, or fresh fruit

Instructions

  1. Preheat the oven:
    Preheat your oven to 350°F (175°C) and lightly grease a small oven-safe ramekin or baking dish.
  2. Blend the ingredients:
    In a blender, combine the rolled oats, banana, egg, almond milk, maple syrup, baking powder, vanilla extract, and salt. Blend until smooth and creamy. The texture should be similar to pancake batter.
  3. Add mix-ins:
    If using, stir in chocolate chips, berries, or nuts.
  4. Bake:
    Pour the mixture into the greased ramekin and bake for 20-25 minutes, or until the top is golden and a toothpick inserted into the center comes out clean.
  5. Serve:
    Let it cool for a few minutes before adding your favorite toppings like peanut butter, yogurt, or fresh fruit. Serve warm.

Nutritional Information (Per Serving)

  • Calories: 350 kcal
  • Protein: 11g
  • Fat: 9g
  • Saturated Fat: 2g
  • Carbohydrates: 54g
  • Fiber: 6g
  • Sugar: 14g
  • Sodium: 200mg

Additional Information:

Why Baked Oats?
Baked oats have taken off on social media, especially for people looking for a healthy yet indulgent breakfast that feels like dessert. Unlike regular stovetop oatmeal, baked oats have a cake-like texture that feels more substantial and satisfying. The best part is the customization—you can make them chocolatey, fruity, or nutty based on your cravings.

Customizable Flavors:
One of the most popular aspects of baked oats is how customizable they are. You can add cocoa powder to create a chocolate version, toss in blueberries or raspberries for a fruity version, or even swirl in peanut butter for a decadent treat. For a dessert-like twist, you can blend in a couple of chocolate chips or a dash of cinnamon.

Health Benefits of Oats:
Oats are packed with fiber, particularly beta-glucan, which is known for its cholesterol-lowering properties. They are also a great source of antioxidants, vitamins, and minerals. Combined with the natural sweetness of bananas and the protein from the egg or flax egg, baked oats provide a balanced, wholesome breakfast or snack option.

Vegan and Gluten-Free Adjustments:
To make this recipe vegan, simply replace the egg with a flax egg (1 tbsp ground flaxseed mixed with 3 tbsp water) and use maple syrup instead of honey. This recipe is naturally gluten-free as long as you use certified gluten-free oats.

Meal Prep Friendly:
Although this is a single-serve recipe, you can easily multiply the ingredients to make a batch of baked oats. Store leftovers in the fridge for up to 3 days, and simply reheat them in the microwave for a quick and easy breakfast.

Notes:

  • Blender tip: Blending the oats helps create that smooth, cake-like texture, but if you prefer a chunkier texture, you can mix the ingredients by hand without blending.
  • Toppings: Experiment with different toppings like almond butter, Greek yogurt, shredded coconut, or even a drizzle of honey for added sweetness.

This Baked Oats recipe is a trendy, delicious, and healthy way to start your day with minimal effort. It’s quick to make, easy to customize, and perfect for those who want a nutritious yet indulgent breakfast or snack.

Read More

Kimchi Fried Rice (Kimchi Bokkeumbap)

Description:
Kimchi Fried Rice, or Kimchi Bokkeumbap, is a flavorful, spicy, and tangy Korean dish that’s quick and easy to prepare. It’s made by stir-frying leftover rice with kimchi, vegetables, and often a protein like eggs or pork. This one-pan meal is perfect for a quick lunch or dinner, and it taps into the rising popularity of Korean cuisine worldwide.

Kimchi, a traditional fermented vegetable dish (usually made with cabbage), adds a unique tang and heat to the fried rice, making this dish a go-to comfort food with probiotic benefits.

Servings:

This recipe serves 4 people.

Ingredients

  • 3 cups cooked and cooled rice (preferably day-old)
  • 1 1/2 cups kimchi, chopped, with 1/4 cup kimchi juice
  • 2 tbsp sesame oil
  • 1 onion, finely chopped
  • 2 garlic cloves, minced
  • 1/2 cup carrots, diced
  • 2 tbsp gochujang (Korean chili paste)
  • 1 tbsp soy sauce
  • 1 tsp sugar
  • 2 eggs, fried (optional, for topping)
  • 2 green onions, sliced (for garnish)
  • 1 tbsp toasted sesame seeds (for garnish)
  • 1 tbsp vegetable oil (for frying)

Instructions

  1. Prepare the rice:
    Use day-old, cold rice for the best results. If you don’t have leftover rice, cook the rice and spread it on a baking sheet to cool quickly.
  2. Cook the aromatics:
    Heat the vegetable oil in a large skillet or wok over medium heat. Add the chopped onions and carrots, and sauté for 3-4 minutes until softened. Add the minced garlic and cook for another minute until fragrant.
  3. Stir-fry the kimchi:
    Add the chopped kimchi to the skillet and stir-fry for about 3-4 minutes, allowing the kimchi to release its flavor and moisture.
  4. Add the rice:
    Add the cold rice to the skillet and break it up with a spatula. Stir-fry everything together for about 5 minutes, making sure the rice is heated through.
  5. Season the rice:
    Stir in the gochujang, soy sauce, sugar, and kimchi juice. Toss everything together to evenly coat the rice with the sauce.
  6. Finish and garnish:
    Turn off the heat and drizzle sesame oil over the fried rice. Garnish with sliced green onions and toasted sesame seeds. For added richness, top each serving with a fried egg if desired.

Nutritional Information (Per Serving, without egg)

  • Calories: 320 kcal
  • Protein: 6g
  • Fat: 10g
  • Saturated Fat: 1.5g
  • Carbohydrates: 48g
  • Fiber: 4g
  • Sugar: 6g
  • Sodium: 780mg

Additional Information:

Why Kimchi Fried Rice?
Kimchi Fried Rice is a fantastic way to use up leftover rice and kimchi, making it an economical and sustainable meal. Beyond its practicality, this dish is packed with flavor—thanks to the tangy, spicy kimchi and umami-rich gochujang. It’s a great introduction to Korean cuisine for beginners and a beloved comfort food for those already familiar with it.

Health Benefits of Kimchi:
Kimchi is rich in probiotics due to its fermentation process, which can support digestive health. It’s also packed with vitamins A, B, and C, as well as antioxidants. Adding kimchi to your meals can be a simple and delicious way to boost your gut health and nutrient intake.

Meal Prep and Storage:
Kimchi Fried Rice is a perfect meal prep option because it stores well in the fridge for up to 3 days. To reheat, simply warm it up in a skillet with a little oil to retain its crispy texture. If you’re planning to store it, hold off on adding the fried egg until you’re ready to serve.

Customization Options:
This dish is highly versatile. You can add any protein you like, such as tofu for a vegan option, or bacon or ham for a richer flavor. For extra vegetables, throw in bell peppers, peas, or spinach. If you prefer milder heat, reduce the amount of gochujang or use a mild chili paste instead.

Dietary Adjustments:
To make this dish vegan, simply omit the fried egg and ensure the kimchi and gochujang you’re using are vegan-friendly. Many traditional brands of kimchi and gochujang may contain seafood ingredients, but there are plenty of plant-based versions available in stores.

Notes:

  • Rice texture tip: Day-old rice works best because it’s drier and doesn’t clump together. If you’re using freshly cooked rice, cool it down quickly by spreading it on a baking sheet or refrigerating it for a bit.
  • Serving suggestion: Kimchi Fried Rice pairs well with a side of pickled radishes or a light cucumber salad for added freshness.

This Kimchi Fried Rice is an easy and flavorful dish that brings together the bold, tangy flavors of Korean cuisine. Whether enjoyed as a quick meal or a side dish, it’s a versatile and satisfying option for any occasion.

Read More

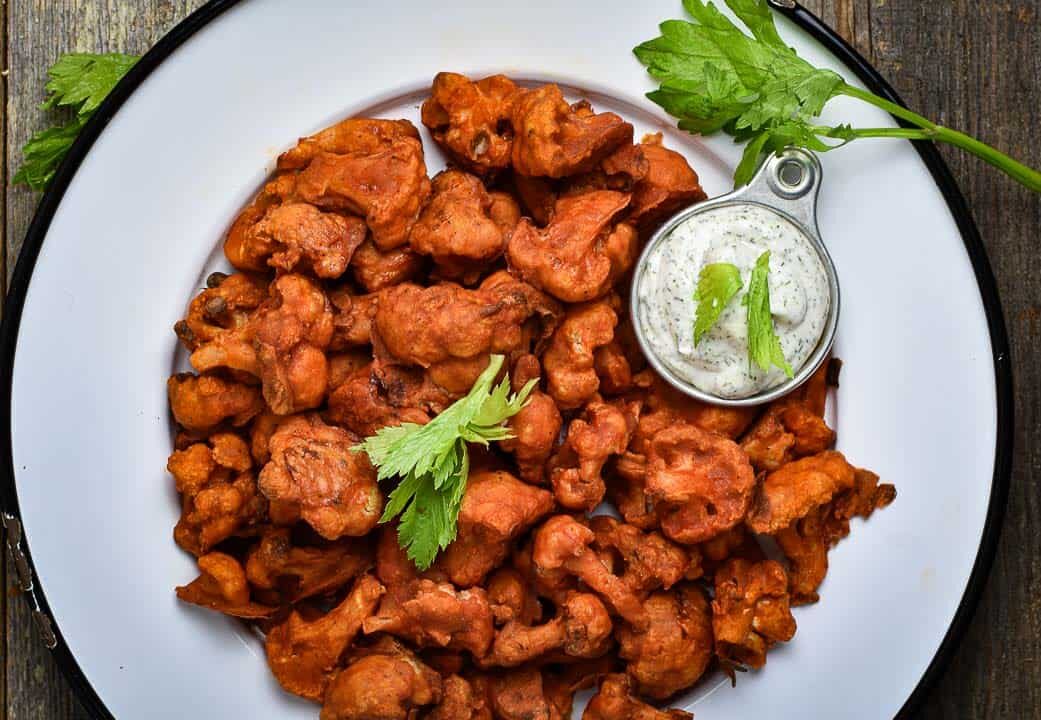
Vegan Buffalo Cauliflower Wings

Description:
These Vegan Buffalo Cauliflower Wings are a delicious, healthy, and spicy alternative to traditional buffalo wings. Made by roasting cauliflower florets in a crispy batter and then tossing them in a tangy buffalo sauce, this dish is perfect for those looking for a plant-based option. It’s a hit at parties, game days, or as a flavorful snack. Serve with vegan ranch or blue cheese dip for the ultimate experience.

Servings:

This recipe serves 4 people.

Ingredients

  • 1 large head of cauliflower, cut into bite-sized florets
  • 1 cup all-purpose flour (or gluten-free flour for a GF option)
  • 1 cup almond milk (or any non-dairy milk of choice)
  • 1 tsp garlic powder
  • 1 tsp paprika
  • 1/2 tsp onion powder
  • 1/4 tsp black pepper
  • 1/4 tsp salt
  • 1 cup buffalo sauce (check ingredients to ensure it’s vegan)
  • 2 tbsp vegan butter, melted
  • Fresh parsley or celery, for garnish (optional)

Instructions

  1. Preheat the oven:
    Preheat your oven to 450°F (230°C). Line a baking sheet with parchment paper or lightly grease it with cooking spray.
  2. Prepare the batter:
    In a large mixing bowl, whisk together the flour, almond milk, garlic powder, paprika, onion powder, salt, and pepper until smooth. The batter should be thick enough to coat the cauliflower but still drip off easily.
  3. Coat the cauliflower:
    Dip each cauliflower floret into the batter, ensuring it is evenly coated. Shake off any excess batter and place the florets in a single layer on the prepared baking sheet.
  4. Bake the cauliflower:
    Bake the cauliflower for 20-25 minutes, turning halfway through, until golden brown and crispy on the edges.
  5. Prepare the buffalo sauce:
    While the cauliflower is baking, whisk together the buffalo sauce and melted vegan butter in a small bowl.
  6. Toss the cauliflower in sauce:
    Once the cauliflower is done baking, remove it from the oven and toss it gently in the buffalo sauce until fully coated. Return the sauced cauliflower to the baking sheet and bake for an additional 10 minutes.
  7. Serve:
    Remove from the oven and let cool slightly. Garnish with fresh parsley or serve with celery sticks, vegan ranch, or vegan blue cheese dip on the side.

Nutritional Information (Per Serving)

  • Calories: 200 kcal
  • Protein: 5g
  • Fat: 9g
  • Saturated Fat: 1.5g
  • Carbohydrates: 28g
  • Fiber: 4g
  • Sugar: 3g
  • Sodium: 900mg

Additional Information:

Why Cauliflower Wings?
Cauliflower wings have become increasingly popular as a healthy and vegan-friendly alternative to traditional chicken wings. Cauliflower is a versatile vegetable that absorbs flavors well and develops a crispy, satisfying texture when roasted. Plus, it’s packed with nutrients like vitamin C, vitamin K, and fiber. These buffalo cauliflower wings provide the spicy, tangy flavor of buffalo wings without the meat, making them ideal for vegans and vegetarians—or anyone looking to reduce their meat intake.

How to Serve:
These wings are best served hot, fresh out of the oven. They pair wonderfully with a vegan ranch or blue cheese dip and are great alongside classic sides like celery or carrot sticks. You can also add them to wraps or sandwiches for a hearty meal.

Meal Prep and Leftovers:
While these wings are best enjoyed fresh, you can store leftovers in the fridge for up to 3 days. To reheat, place them back in the oven at 375°F (190°C) for about 10-12 minutes to re-crisp them. Avoid microwaving, as it may make them soggy.

Customization Options:
For those who enjoy a little extra heat, feel free to add a pinch of cayenne pepper to the batter or sauce. If you prefer a milder version, you can use BBQ sauce instead of buffalo sauce. The batter can also be customized with different seasonings to fit your taste preferences—try adding smoked paprika or nutritional yeast for added depth.

Dietary Adjustments:
This recipe is naturally vegan and can easily be made gluten-free by substituting all-purpose flour with a gluten-free flour blend. If you are avoiding oil or butter, you can skip the vegan butter in the buffalo sauce for a slightly lighter version.

Notes:

  • Crispiness tip: For extra crispy wings, broil them for 1-2 minutes after tossing them in the buffalo sauce, but keep an eye on them to avoid burning.
  • Serving suggestion: These wings make an excellent appetizer or side dish at gatherings, game days, or even as a flavorful snack. If you’re making this dish for a crowd, feel free to double the recipe!

These Vegan Buffalo Cauliflower Wings are a must-try for anyone looking to enjoy the classic flavors of buffalo wings in a healthier, plant-based form. Whether you’re vegan, vegetarian, or just curious, these wings are sure to become a favorite!

Read More

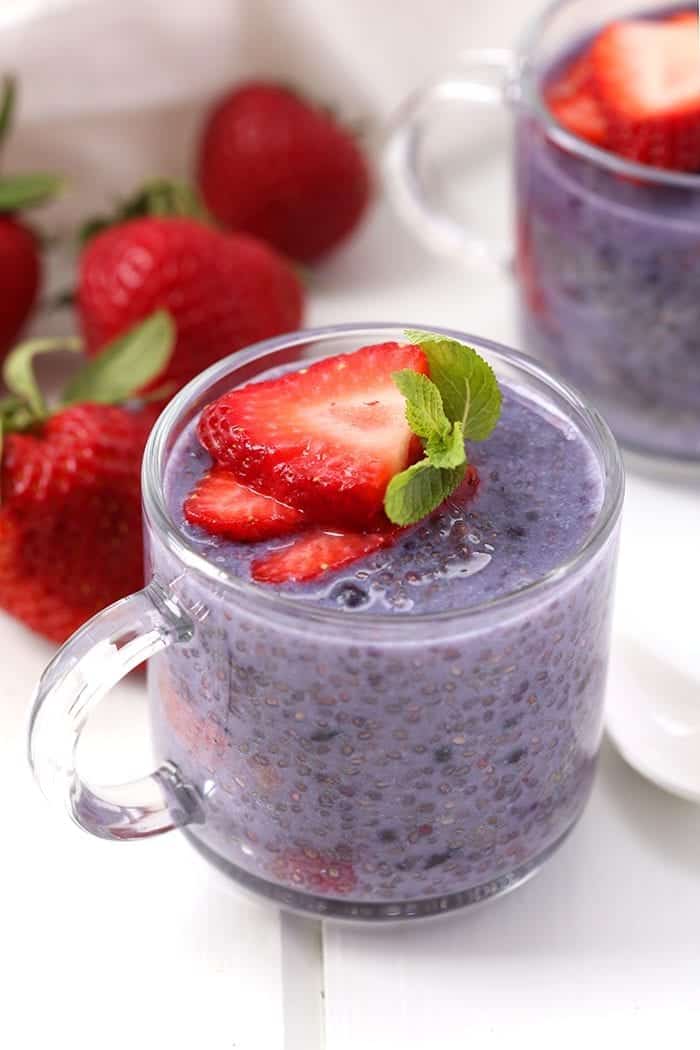
Chia Pudding with Berries and Honey

Description:
Chia pudding is a creamy and nutrient-dense dish made with chia seeds soaked in liquid until they form a gel-like consistency. It’s rich in fiber, omega-3 fatty acids, and essential nutrients, making it a popular choice for health-conscious eaters. This versatile recipe can be enjoyed as a breakfast, snack, or dessert, and it’s easy to customize with your favorite flavors and toppings.

Chia seeds are unique because they can absorb up to 12 times their weight in liquid, creating a thick, pudding-like texture. In addition to being highly nutritious, they’re also hydrating and can help promote a feeling of fullness, making this dish ideal for those looking for a healthy and satisfying option.

Servings:

This recipe serves 4 people.

Ingredients

  • 1/2 cup chia seeds
  • 2 cups almond milk (or any milk of choice)
  • 1 tbsp maple syrup or honey (optional)
  • 1 tsp vanilla extract
  • Fresh berries (blueberries, raspberries, or strawberries) for topping
  • 2 tbsp sliced almonds or granola, for garnish (optional)
  • 1 tbsp honey, for drizzling (optional)

Instructions

  1. Mix the chia pudding base:
    In a medium bowl, whisk together chia seeds, almond milk, maple syrup (or honey), and vanilla extract. Stir well to ensure the chia seeds are evenly dispersed.
  2. Let it set:
    Cover the bowl and refrigerate for at least 4 hours, or overnight. The chia seeds will absorb the liquid and thicken to a pudding-like consistency.
  3. Stir and adjust consistency:
    After the chia pudding has set, stir it to break up any clumps. If the pudding is too thick, you can stir in a bit more almond milk to reach your desired consistency.
  4. Serve:
    Divide the chia pudding into bowls or jars. Top with fresh berries, sliced almonds or granola, and a drizzle of honey for sweetness.

Nutritional Information (Per Serving)

  • Calories: 190 kcal
  • Protein: 5g
  • Fat: 11g
  • Saturated Fat: 1g
  • Carbohydrates: 17g
  • Fiber: 11g
  • Sugar: 7g
  • Sodium: 60mg

Additional Information:

Health Benefits of Chia Seeds:
Chia seeds are often referred to as a superfood due to their impressive nutritional profile. They are an excellent source of omega-3 fatty acids, which are essential for heart health. Additionally, chia seeds are rich in fiber, which aids in digestion and promotes satiety. The protein content in chia seeds also makes them a great option for those following plant-based diets.

Make-Ahead and Meal Prep Tips:
Chia pudding can be made ahead of time and stored in the fridge for up to 5 days, making it an ideal option for meal prepping. Prepare the pudding in individual jars for an easy grab-and-go breakfast or snack. Customize each serving with different toppings like fruit, nuts, or coconut flakes to keep things exciting throughout the week.

Dietary Adjustments:
This recipe is naturally gluten-free and can easily be made vegan by using maple syrup instead of honey. For those with nut allergies, substitute almond milk with coconut milk, oat milk, or any other dairy-free alternative. The dish is flexible, allowing you to cater to a variety of dietary preferences without compromising on flavor.

Customization Ideas:
While this recipe highlights berries and honey, chia pudding is a fantastic base for other flavors. Add cocoa powder for a chocolate chia pudding or blend the mixture with fruits like mangoes or bananas for a fruit-infused version. You can also experiment with spices like cinnamon or nutmeg for extra warmth and depth of flavor.

Notes:

  • Sweetness adjustment: Adjust the amount of sweetener (honey or maple syrup) according to your taste. You can even omit it altogether if you prefer a more neutral base.
  • Consistency: The longer the chia pudding sits, the thicker it will become. If you prefer a thinner consistency, simply add more almond milk before serving.
  • Toppings: Don’t hesitate to get creative with your toppings—try shredded coconut, dark chocolate shavings, or even nut butter for a richer treat.

This chia pudding recipe is not only delicious but also nutritious and easy to make, making it a perfect addition to any healthy eating routine. Whether you enjoy it for breakfast, a snack, or dessert, it’s sure to become a favorite in your household.

Read More

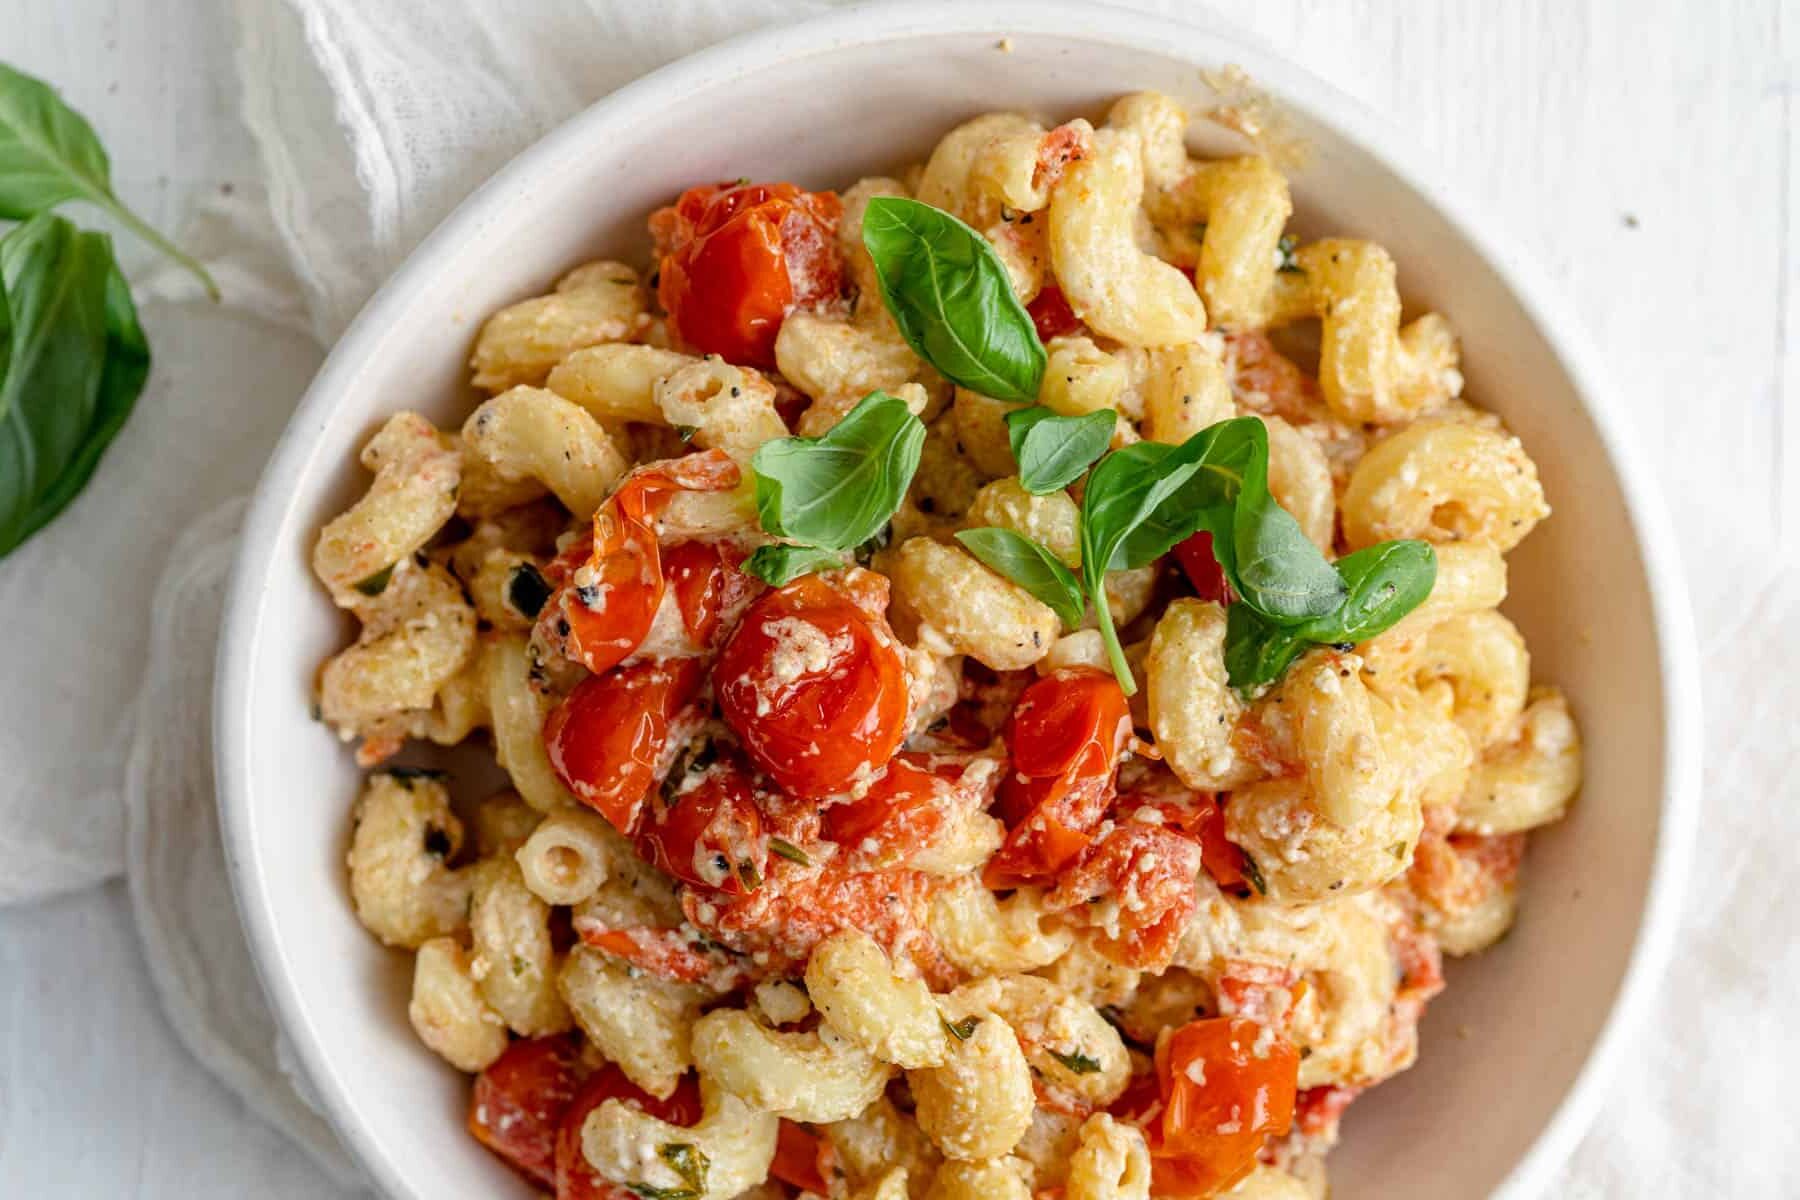
Baked Feta Pasta

Description:
This viral baked feta pasta combines creamy, tangy feta cheese with roasted cherry tomatoes and garlic, all mixed into al dente pasta for a rich, flavorful dish. With minimal prep and just a few ingredients, it’s the perfect easy weeknight dinner that’s taken social media by storm.

Servings:

This recipe serves 4 people.

Ingredients

  • 8 oz block of feta cheese
  • 2 pints cherry tomatoes
  • 3 garlic cloves, minced
  • 1/4 cup extra virgin olive oil
  • 1 tsp dried oregano
  • 1/2 tsp red pepper flakes (optional)
  • Salt and black pepper, to taste
  • 10 oz pasta (such as penne or rigatoni)
  • Fresh basil leaves, for garnish
  • Parmesan cheese, for garnish (optional)

Instructions

  1. Preheat the oven:
    Preheat your oven to 400°F (200°C).
  2. Prepare the feta and tomatoes:
    In a large baking dish, place the block of feta cheese in the center. Surround the feta with the cherry tomatoes. Drizzle the olive oil over the tomatoes and feta. Sprinkle the minced garlic, oregano, red pepper flakes (if using), salt, and black pepper over everything.
  3. Bake:
    Bake in the preheated oven for 25-30 minutes, until the tomatoes have burst and the feta is golden and soft.
  4. Cook the pasta:
    While the feta and tomatoes are baking, cook the pasta in a large pot of salted water according to package instructions. Reserve about 1/2 cup of pasta water, then drain the pasta.
  5. Mix it all together:
    Once the feta and tomatoes are done, use a spoon or spatula to mash the feta and tomatoes together in the baking dish, creating a creamy sauce. Add the cooked pasta and toss everything together, adding a bit of reserved pasta water if needed to loosen the sauce.
  6. Serve:
    Garnish with fresh basil leaves and Parmesan cheese (optional). Serve immediately.

Nutritional Information (Per Serving)

  • Calories: 450 kcal
  • Protein: 13g
  • Fat: 22g
  • Saturated Fat: 8g
  • Carbohydrates: 52g
  • Fiber: 4g
  • Sugar: 6g
  • Sodium: 550mg

Notes:

  • Add protein: You can add grilled chicken, shrimp, or even a plant-based protein to make this dish more substantial.
  • Gluten-free option: Substitute with gluten-free pasta to make this dish suitable for those with gluten sensitivities.
  • Add greens: Toss in some fresh spinach or arugula for an extra boost of veggies.

Read More