Month: October 2024

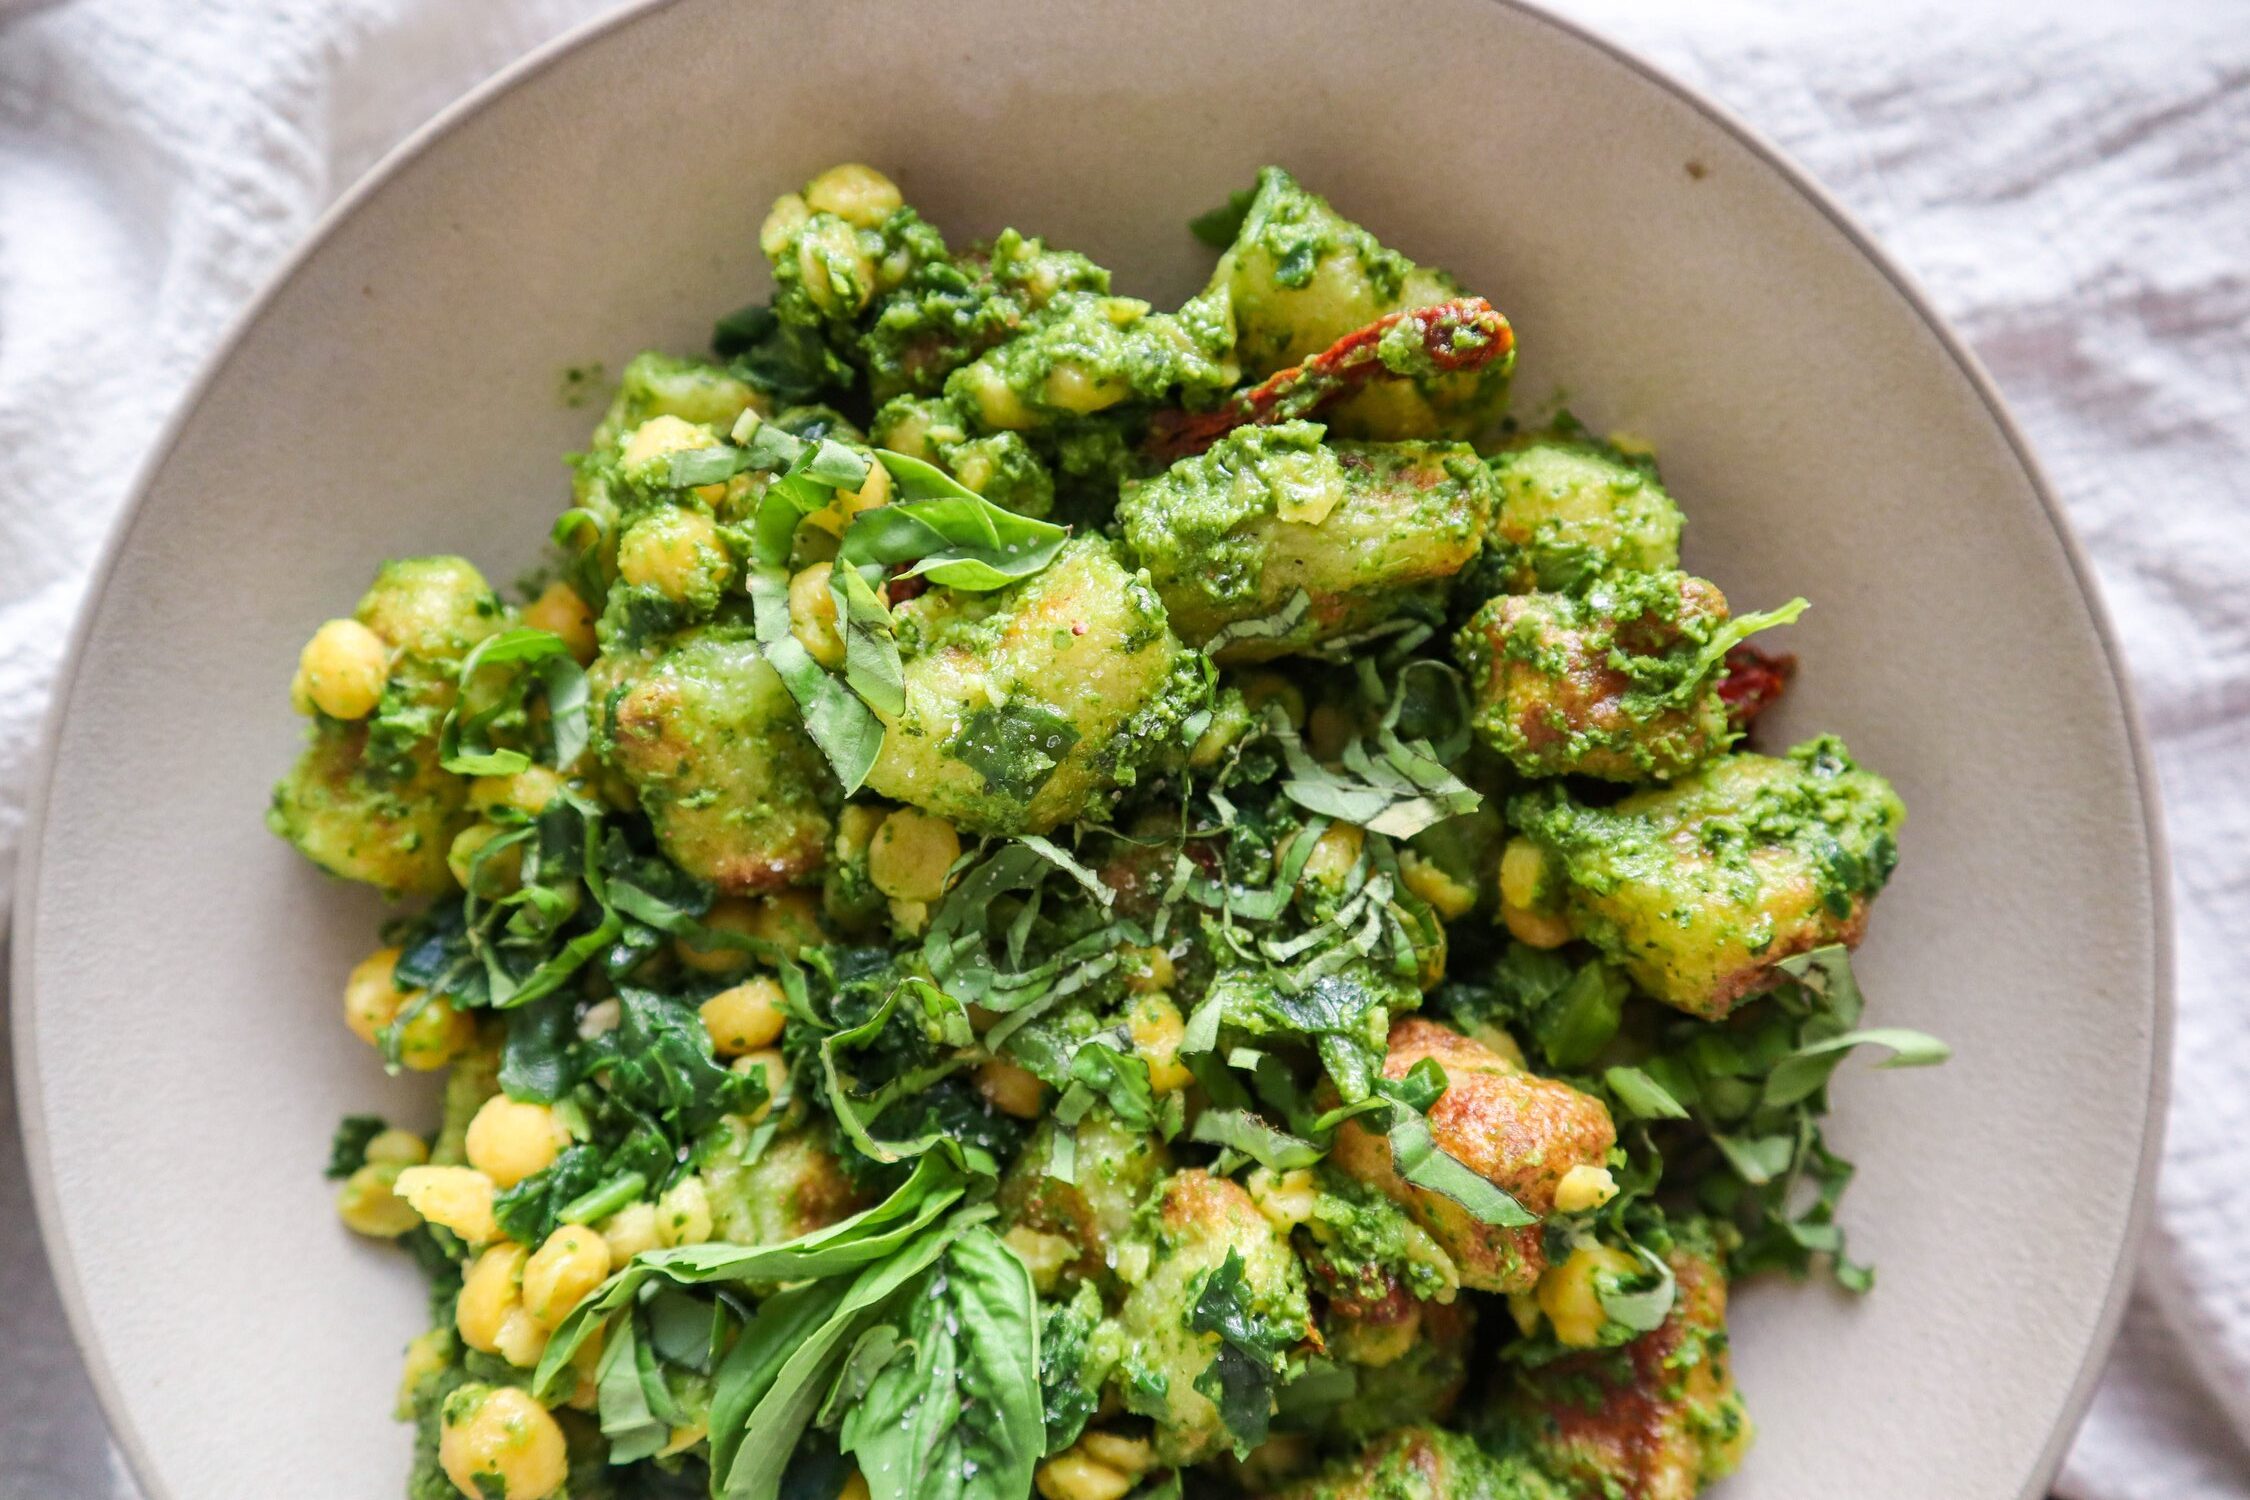
Cauliflower Gnocchi with Pesto

Cauliflower gnocchi with pesto is a trending, low-carb, and gluten-free dish that’s perfect for those following popular diets like keto and paleo. This dish features pillowy cauliflower-based gnocchi coated in a rich and flavorful pesto sauce. It’s light yet satisfying, making it ideal for a quick dinner or lunch.


Ingredients

  • 1 lb cauliflower gnocchi (store-bought or homemade)
  • 1/4 cup pesto (store-bought or homemade)
  • 2 tbsp olive oil
  • 2 garlic cloves, minced
  • 1/4 cup grated Parmesan cheese (optional, for garnish)
  • 1/4 cup pine nuts, toasted (optional, for garnish)
  • Fresh basil leaves, for garnish
  • Salt and pepper, to taste

Instructions

  1. Cook the gnocchi:
    Heat olive oil in a large skillet over medium heat. Add the gnocchi and cook for 6-8 minutes, turning occasionally, until the gnocchi are golden and crispy on the outside.
  2. Sauté the garlic:
    Add minced garlic to the skillet and cook for 1 minute, stirring frequently to prevent burning.
  3. Add the pesto:
    Reduce heat to low and stir in the pesto sauce, making sure to coat the gnocchi evenly. Cook for an additional 2-3 minutes until heated through. Season with salt and pepper to taste.
  4. Serve and garnish:
    Remove from heat and garnish with grated Parmesan cheese, toasted pine nuts, and fresh basil leaves. Serve hot.

Prep Time:

5 minutes

Cook Time:

10 minutes

Total Time:

15 minutes


Servings:

Serves 4


Nutritional Information (Per Serving)

  • Calories: 280 kcal
  • Protein: 8g
  • Fat: 19g
  • Saturated Fat: 3g
  • Carbohydrates: 20g
  • Fiber: 3g
  • Sugar: 2g
  • Sodium: 400mg

Additional Information:

Cauliflower gnocchi has become a popular low-carb alternative to traditional gnocchi, offering a lighter and gluten-free option. Paired with a fresh, herbaceous pesto, this dish brings a burst of flavor while fitting within various diet plans.

Diets:
This dish fits into the following dietary lifestyles:

  • Keto
  • Paleo
  • Gluten-Free
  • Low-Carb
  • Vegetarian

Cuisine Type:
Pasta, Italian-Inspired


Notes:

  • Store-bought gnocchi: Cauliflower gnocchi can often be found in the frozen section of most grocery stores.
  • Garnishes: While optional, Parmesan cheese and toasted pine nuts add texture and richness to the dish.

Read More

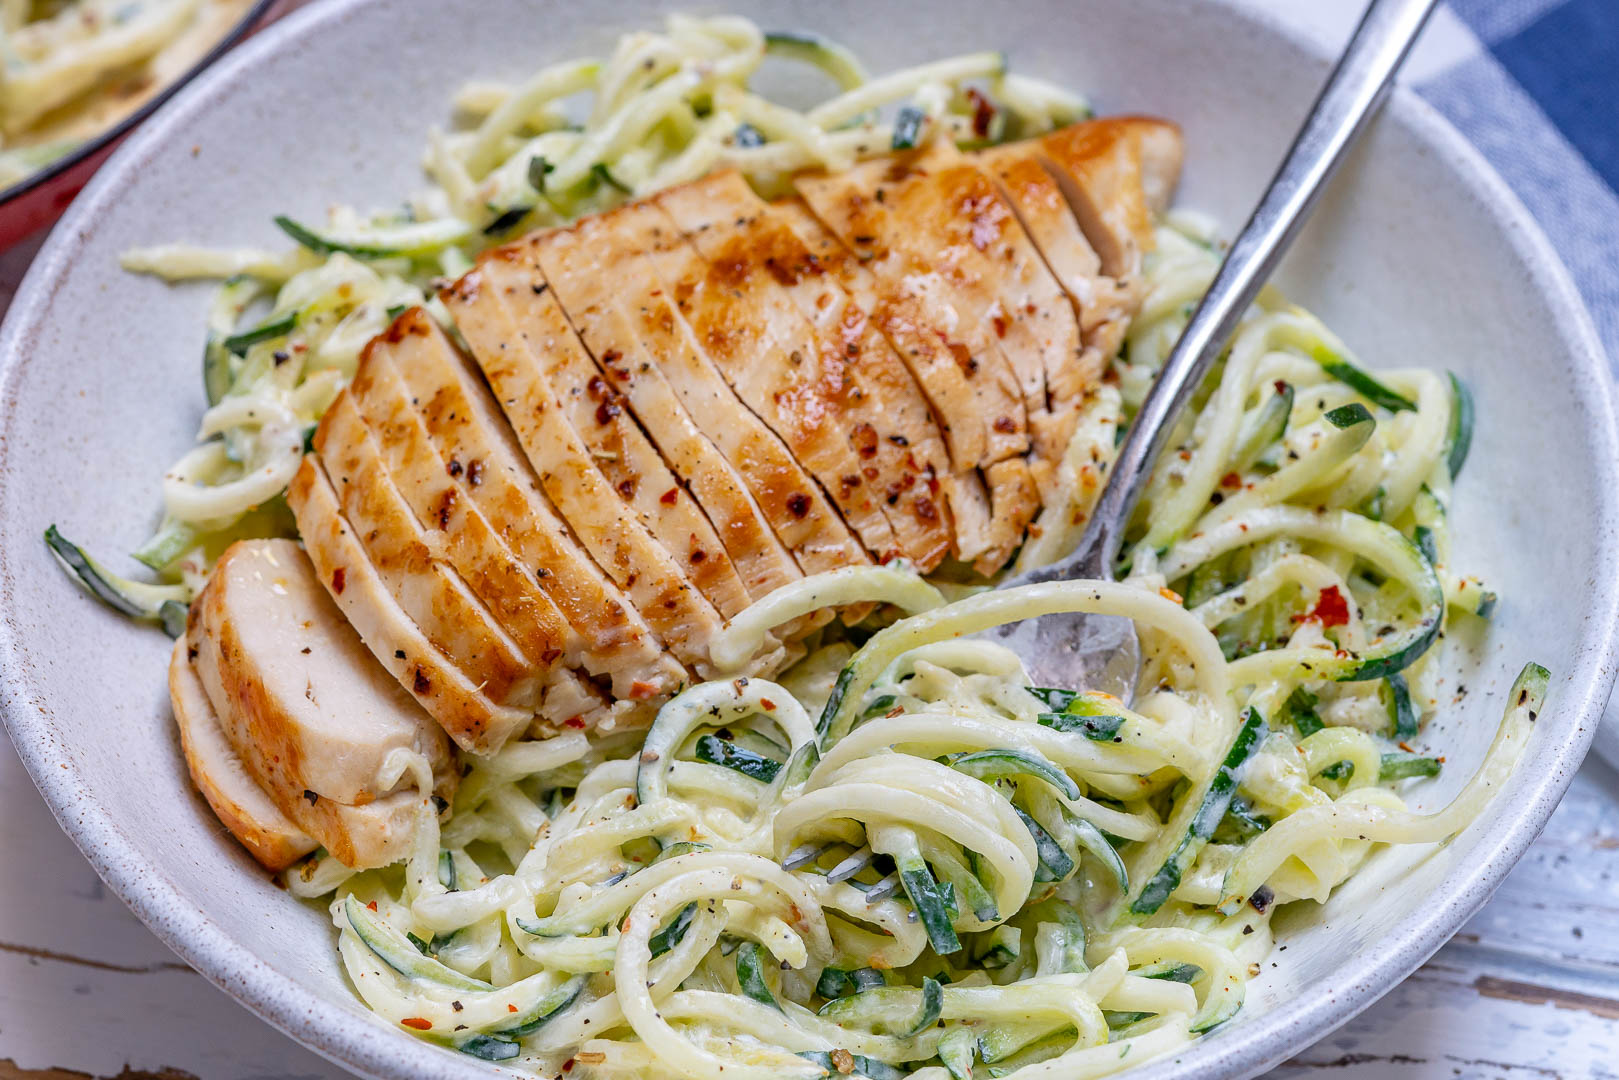
Keto Chicken Alfredo with Zucchini Noodles

This Keto Chicken Alfredo with Zucchini Noodles is a low-carb, high-fat dish that satisfies the craving for comfort food while staying within the ketogenic diet. Creamy alfredo sauce made from scratch pairs perfectly with tender chicken and fresh zucchini noodles, offering a delicious and nutritious alternative to pasta.


Ingredients

  • 2 large chicken breasts, boneless and skinless
  • 4 medium zucchini, spiralized
  • 2 tbsp olive oil
  • 3 garlic cloves, minced
  • 1 cup heavy cream
  • 1/2 cup grated Parmesan cheese
  • 2 tbsp butter
  • 1/2 tsp Italian seasoning
  • Salt and pepper, to taste
  • Fresh parsley, chopped (for garnish)

Instructions

  1. Prepare the chicken:
    Season the chicken breasts with salt, pepper, and Italian seasoning. Heat olive oil in a large skillet over medium-high heat. Add the chicken breasts and cook for 6-7 minutes per side, until fully cooked and golden brown. Remove the chicken from the skillet, slice, and set aside.
  2. Make the Alfredo sauce:
    In the same skillet, melt the butter and sauté the minced garlic for about 1 minute, until fragrant. Add the heavy cream and bring to a simmer. Stir in the Parmesan cheese and cook for 2-3 minutes until the sauce thickens slightly. Season with additional salt and pepper to taste.
  3. Prepare the zucchini noodles:
    While the sauce is cooking, spiralize the zucchini into noodles. Lightly sauté the zucchini noodles in a separate pan with olive oil for 2-3 minutes, just until they begin to soften (do not overcook, as they can become watery).
  4. Combine and serve:
    Toss the zucchini noodles in the Alfredo sauce. Add the sliced chicken on top and garnish with fresh parsley. Serve immediately.

Prep Time:

10 minutes

Cook Time:

20 minutes

Total Time:

30 minutes


Servings:

Serves 4


Nutritional Information (Per Serving)

  • Calories: 420 kcal
  • Protein: 28g
  • Fat: 32g
  • Saturated Fat: 16g
  • Carbohydrates: 6g
  • Fiber: 2g
  • Sugar: 3g
  • Sodium: 480mg

Additional Information:

Keto Chicken Alfredo with Zucchini Noodles is a keto-friendly take on the classic pasta dish, offering a low-carb alternative by using zucchini noodles instead of traditional pasta. The rich Alfredo sauce combined with juicy chicken creates a creamy, satisfying meal that is perfect for those following a ketogenic or low-carb diet.

Diets:
This dish fits into the following dietary lifestyles:

  • Keto
  • Low-Carb
  • Gluten-Free
  • Paleo

Cuisine Type:
Pasta, Keto, Low-Carb


Notes:

  • For extra flavor: You can add mushrooms or spinach to the sauce.
  • Zucchini noodles: Be sure not to overcook the zucchini noodles to avoid them becoming watery.

Read More

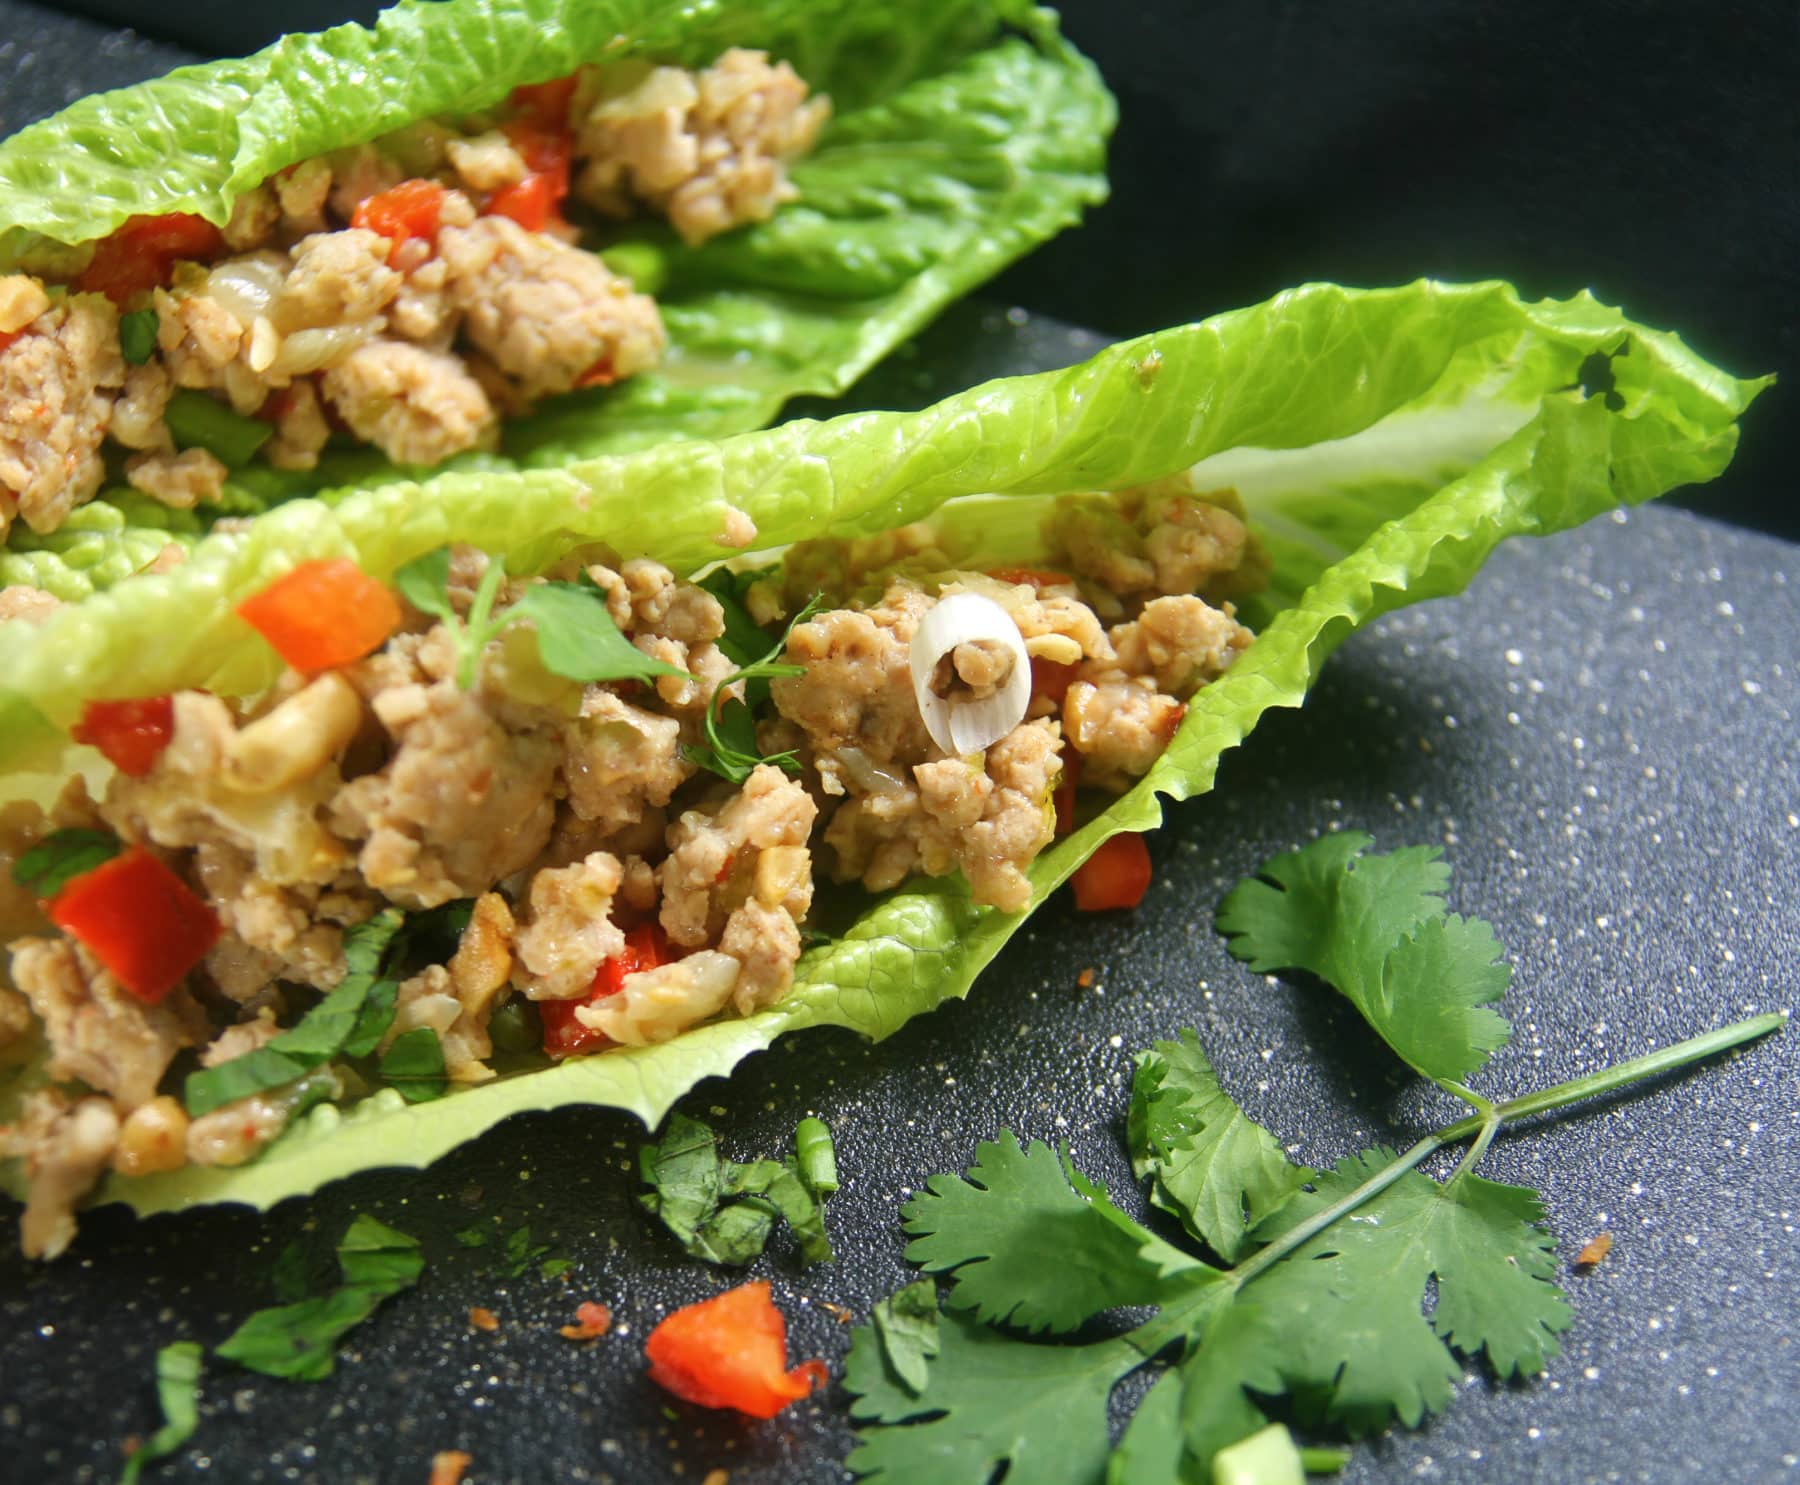
Keto Chicken Lettuce Wraps

Keto chicken lettuce wraps are a delicious, low-carb dish that’s packed with flavor. Tender ground chicken is stir-fried with ginger, garlic, and sesame oil, then wrapped in crisp lettuce leaves. This meal is perfect for anyone following a keto or low-carb lifestyle, providing a refreshing yet filling option that’s easy to make.


Ingredients

  • 1 lb ground chicken
  • 2 tbsp sesame oil
  • 3 garlic cloves, minced
  • 1 tbsp fresh ginger, grated
  • 1/4 cup soy sauce (or tamari for gluten-free)
  • 1 tbsp rice vinegar
  • 1 tbsp sriracha (optional, for heat)
  • 1 tsp sesame seeds (optional, for garnish)
  • 8 large lettuce leaves (butter lettuce or romaine)
  • 2 green onions, sliced (for garnish)

Instructions

  1. Cook the chicken:
    In a large skillet, heat sesame oil over medium heat. Add the ground chicken and cook until browned, breaking it up into crumbles, about 6-8 minutes.
  2. Add aromatics:
    Stir in the garlic and ginger, cooking for an additional 1-2 minutes until fragrant.
  3. Add sauce:
    Pour in the soy sauce, rice vinegar, and sriracha (if using). Stir to combine and cook for another 2-3 minutes, allowing the sauce to thicken slightly.
  4. Assemble the wraps:
    Lay out the lettuce leaves on a serving plate. Spoon the chicken mixture into each leaf. Garnish with sesame seeds and sliced green onions.
  5. Serve:
    Serve immediately, allowing everyone to wrap the lettuce around the chicken mixture and enjoy.

Prep Time:

10 minutes

Cook Time:

15 minutes

Total Time:

25 minutes


Servings:

Serves 4


Nutritional Information (Per Serving)

  • Calories: 210 kcal
  • Protein: 25g
  • Fat: 12g
  • Saturated Fat: 3g
  • Carbohydrates: 5g
  • Fiber: 1g
  • Sugar: 1g
  • Sodium: 800mg

Additional Information:

Keto chicken lettuce wraps are a satisfying low-carb meal that fits perfectly into ketogenic, paleo, and low-carb diets. The crispness of the lettuce provides a fresh contrast to the savory chicken, making it a light but flavorful option. This dish is versatile and can be served as an appetizer, lunch, or dinner.

Diets:
This dish fits into the following dietary lifestyles:

  • Keto
  • Low-Carb
  • Paleo
  • Gluten-Free
  • Dairy-Free

Cuisine Type:
Asian-Inspired


Notes:

  • Lettuce variety: Butter lettuce works best for wraps due to its flexibility and large leaves, but romaine or iceberg can be used as well.
  • Adjust heat: If you prefer a milder flavor, you can omit the sriracha, or add extra for more spice.

Read More

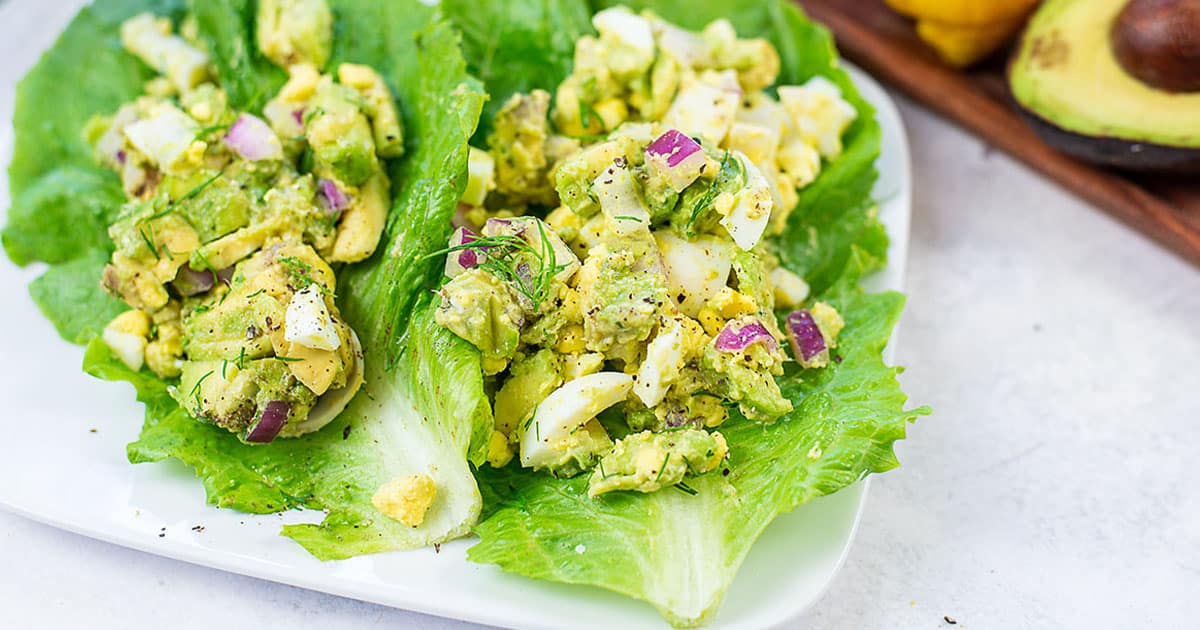
Keto Avocado Egg Salad

Keto avocado egg salad is a creamy, satisfying dish that combines the richness of avocado with protein-packed hard-boiled eggs. This quick and easy salad fits perfectly into a ketogenic or low-carb lifestyle, making it a popular choice for those on high-fat, low-carb diets. The tangy dressing enhances the flavor while keeping it light and refreshing, ideal for a quick lunch or snack.


Ingredients

  • 4 large hard-boiled eggs, peeled and chopped
  • 1 large avocado, peeled and diced
  • 2 tbsp mayonnaise
  • 1 tbsp Dijon mustard
  • 1 tbsp fresh lemon juice
  • 1/4 cup red onion, finely chopped
  • 1 tbsp fresh parsley, chopped
  • Salt and pepper, to taste
  • Paprika, for garnish (optional)

Instructions

  1. Prepare the eggs and avocado:
    In a medium bowl, add the chopped hard-boiled eggs and diced avocado.
  2. Make the dressing:
    In a small bowl, whisk together the mayonnaise, Dijon mustard, and lemon juice until smooth. Season with salt and pepper to taste.
  3. Toss the salad:
    Add the dressing to the eggs and avocado, and gently mix until the salad is well-coated. Be careful not to mash the avocado too much.
  4. Garnish and serve:
    Top the salad with freshly chopped parsley and a sprinkle of paprika for color. Serve immediately or refrigerate for later.

Prep Time:

10 minutes

Cook Time:

N/A

Total Time:

10 minutes


Servings:

Serves 2


Nutritional Information (Per Serving)

  • Calories: 320 kcal
  • Protein: 12g
  • Fat: 28g
  • Saturated Fat: 6g
  • Carbohydrates: 6g
  • Fiber: 4g
  • Sugar: 1g
  • Sodium: 340mg

Additional Information:

Keto avocado egg salad combines healthy fats from avocado and eggs, making it an ideal dish for those following the ketogenic or low-carb lifestyle. It’s not only rich in flavor but also provides a good dose of protein to keep you feeling full and energized. Perfect for meal prep or as a light snack.

Diets:
This dish fits into the following dietary lifestyles:

  • Keto
  • Low-Carb
  • Gluten-Free
  • Paleo

Cuisine Type:
Salad


Notes:

  • Storage: Store any leftovers in an airtight container in the fridge for up to 2 days. Stir before serving.
  • Optional add-ins: For extra crunch, add chopped celery or cucumber to the salad.

Read More

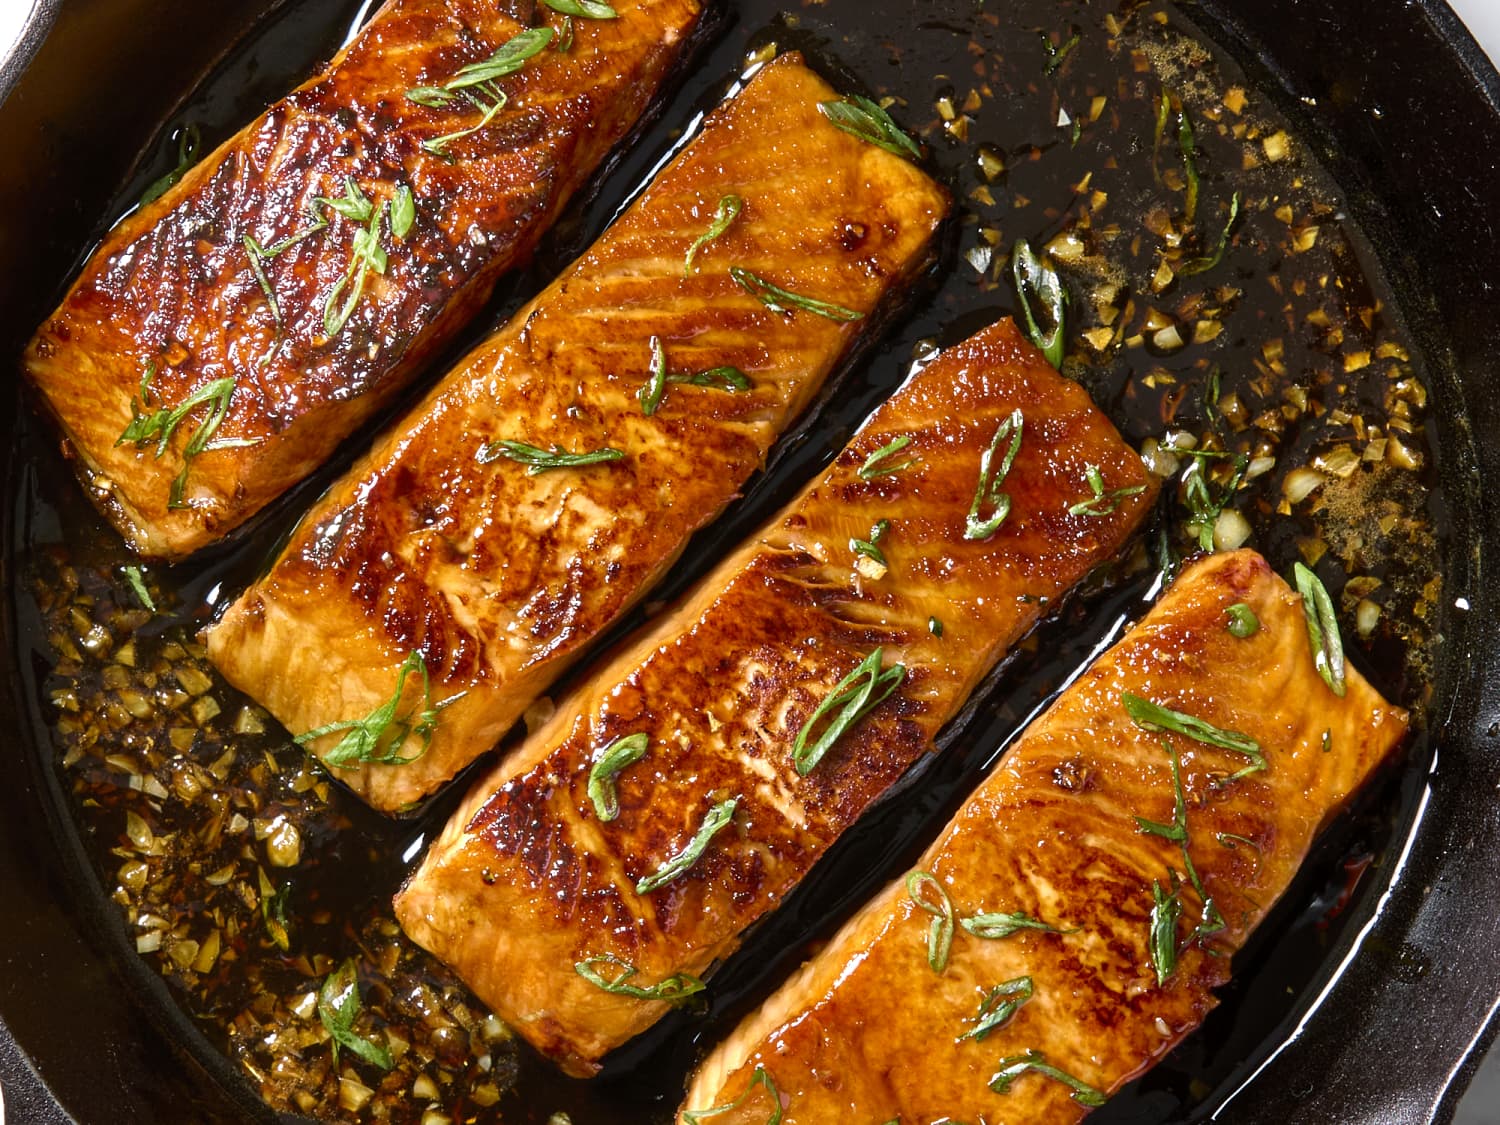
Spicy Honey Garlic Salmon

Spicy honey garlic salmon combines sweet, spicy, and savory flavors, creating a dish that is both satisfying and quick to prepare. The salmon is pan-seared and then glazed with a spicy honey garlic sauce, giving it a rich caramelization and bold taste. This meal is perfect for a quick weeknight dinner but elegant enough for entertaining.


Ingredients

  • 4 salmon fillets (6 oz each, skinless or skin-on)
  • 2 tbsp olive oil
  • 1/4 cup honey
  • 3 garlic cloves, minced
  • 1 tbsp sriracha (or hot sauce of choice)
  • 2 tbsp soy sauce (or tamari for gluten-free)
  • 1 tbsp fresh lemon juice
  • 1 tsp fresh ginger, grated
  • Salt and pepper, to taste
  • Fresh cilantro, chopped (for garnish)
  • Lemon wedges (for serving)

Instructions

  1. Prepare the salmon:
    Pat the salmon fillets dry with paper towels and season with salt and pepper on both sides.
  2. Make the honey garlic sauce:
    In a small bowl, whisk together honey, minced garlic, sriracha, soy sauce, lemon juice, and grated ginger. Set aside.
  3. Sear the salmon:
    Heat olive oil in a large skillet over medium-high heat. Add the salmon fillets, skin-side down (if using skin-on), and cook for 4-5 minutes, until crispy. Flip the fillets and cook for another 3-4 minutes until the salmon is just cooked through.
  4. Add the sauce:
    Pour the honey garlic sauce over the salmon and reduce the heat to medium. Cook for 2-3 more minutes, basting the salmon with the sauce as it thickens and caramelizes.
  5. Serve:
    Remove the salmon from the heat and garnish with fresh cilantro. Serve with lemon wedges on the side.

Prep Time:

10 minutes

Cook Time:

15 minutes

Total Time:

25 minutes


Servings:

Serves 4


Nutritional Information (Per Serving)

  • Calories: 420 kcal
  • Protein: 34g
  • Fat: 20g
  • Saturated Fat: 3g
  • Carbohydrates: 20g
  • Fiber: 0g
  • Sugar: 17g
  • Sodium: 650mg

Additional Information:

Spicy honey garlic salmon offers a perfect balance of sweet and spicy, with the honey creating a beautiful caramelized glaze over the tender fish. This dish is inspired by a combination of Asian and Western flavors and is ideal for anyone who loves a quick, flavorful seafood option.

Diets:
This dish fits into the following dietary lifestyles:

  • Gluten-Free (if using tamari)
  • Mediterranean
  • Low-Carb
  • Paleo

Cuisine Type:
Seafood, Asian-Inspired


Notes:

  • Optional sides: This dish pairs wonderfully with steamed vegetables, quinoa, or a fresh green salad.
  • Adjust heat level: Add more or less sriracha based on your desired spice level.

Read More

Creamy Tahini Chickpea Salad

Creamy tahini chickpea salad is a refreshing and flavorful dish made with protein-packed chickpeas, crisp vegetables, and a rich, nutty tahini dressing. This versatile salad can be enjoyed as a light main dish or a side, perfect for those seeking a healthy, Mediterranean-inspired meal. With minimal prep and no cooking required, it’s a convenient and delicious option for busy weeknights or a quick lunch


Ingredients

  • 1 can (15 oz) chickpeas, drained and rinsed
  • 1 cucumber, diced
  • 1 cup cherry tomatoes, halved
  • 1/4 red onion, finely chopped
  • 1/4 cup fresh parsley, chopped
  • 2 tbsp sesame seeds (optional, for garnish)

For the Tahini Dressing:

  • 1/4 cup tahini
  • 2 tbsp lemon juice
  • 1 tbsp olive oil
  • 1 garlic clove, minced
  • 2 tbsp water (to thin the dressing)
  • Salt and pepper, to taste

Instructions

  1. Prepare the vegetables and chickpeas:
    In a large mixing bowl, combine the chickpeas, diced cucumber, cherry tomatoes, red onion, and chopped parsley.
  2. Make the tahini dressing:
    In a small bowl, whisk together the tahini, lemon juice, olive oil, minced garlic, and water. Add more water if needed to achieve a smooth, pourable consistency. Season with salt and pepper to taste.
  3. Toss the salad:
    Pour the tahini dressing over the chickpea and vegetable mixture. Toss until everything is evenly coated with the dressing.
  4. Garnish and serve:
    Garnish with sesame seeds and additional parsley if desired. Serve immediately or refrigerate for later.

Prep Time:

10 minutes

Cook Time:

N/A

Total Time:

10 minutes


Servings:

Serves 4


Nutritional Information (Per Serving)

  • Calories: 260 kcal
  • Protein: 8g
  • Fat: 15g
  • Saturated Fat: 2g
  • Carbohydrates: 25g
  • Fiber: 6g
  • Sugar: 5g
  • Sodium: 200mg

Additional Information:

This creamy tahini chickpea salad is inspired by Mediterranean flavors, making it a refreshing, nutrient-packed option for a healthy meal. The combination of creamy tahini, bright lemon, and fresh vegetables creates a satisfying dish that can be served as a light main or side dish.

Diets:
This dish fits into the following dietary lifestyles:

  • Vegan
  • Vegetarian
  • Mediterranean
  • Gluten-Free
  • Dairy-Free
  • Low-Carb

Cuisine Type:
Mediterranean, Salad


Notes:

  • Serving suggestions: This salad can be served on its own, as a filling for pita bread, or alongside grilled vegetables or falafel for a heartier meal.
  • Storage: Store leftovers in an airtight container in the refrigerator for up to 2 days. Stir the salad before serving to redistribute the dressing.

Read More

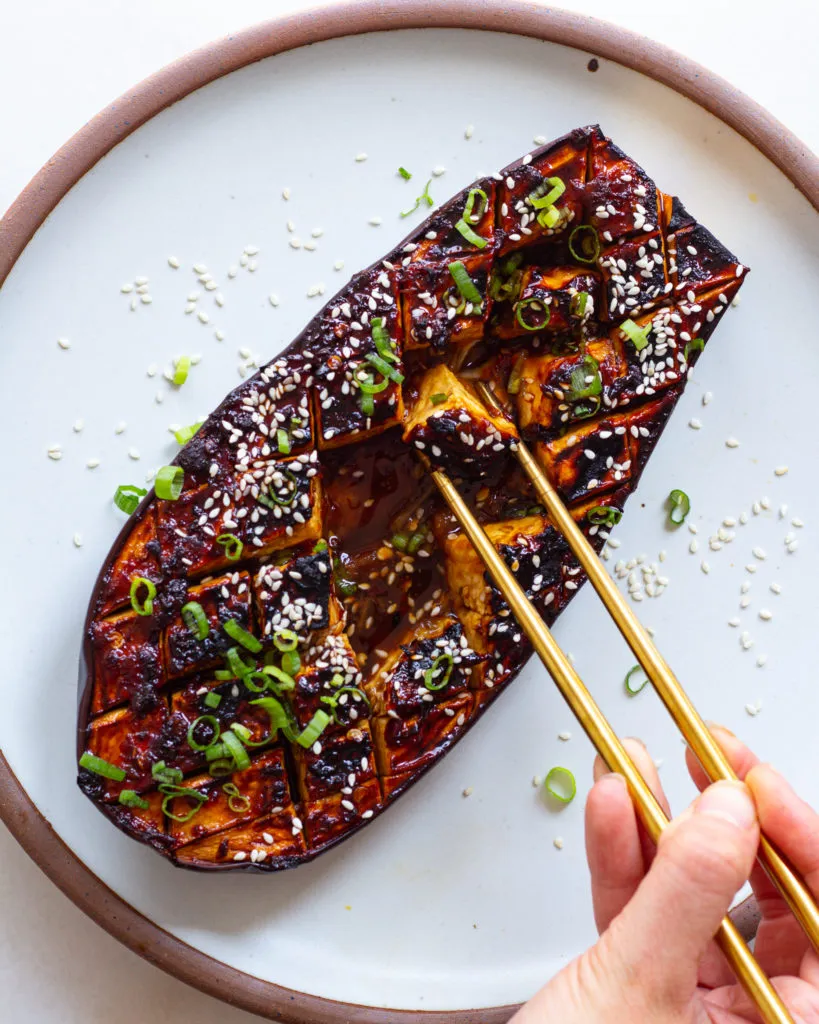
Miso Glazed Eggplant

Description:
Miso glazed eggplant is a trendy, flavorful dish that brings together the umami-rich flavor of miso with the natural creaminess of roasted eggplant. The dish is caramelized to perfection in the oven, leaving a savory, slightly sweet glaze on the eggplant. This simple yet sophisticated dish is ideal as a main course or a side dish. It’s a quick way to bring bold, Japanese-inspired flavors to your table with minimal effort.


Ingredients

  • 2 large eggplants, halved lengthwise
  • 2 tbsp olive oil
  • 3 tbsp white miso paste
  • 1 tbsp soy sauce
  • 1 tbsp mirin (or rice vinegar)
  • 1 tbsp honey (or maple syrup for vegan)
  • 1 garlic clove, minced
  • 1 tsp sesame oil
  • 1 tsp sesame seeds, for garnish
  • 2 green onions, sliced (for garnish)

Instructions

  1. Preheat the oven:
    Preheat your oven to 400°F (200°C) and line a baking sheet with parchment paper.
  2. Prepare the eggplant:
    Score the flesh of each eggplant half in a crosshatch pattern without cutting through the skin. Brush the eggplants with olive oil and place them cut side up on the baking sheet. Roast in the preheated oven for 25-30 minutes, until the eggplant is soft and golden.
  3. Make the miso glaze:
    While the eggplants are roasting, whisk together the miso paste, soy sauce, mirin, honey (or maple syrup), minced garlic, and sesame oil in a small bowl until smooth.
  4. Glaze the eggplant:
    Remove the eggplant from the oven and brush the miso glaze generously over the cut sides of the roasted eggplants. Return the eggplant to the oven and roast for another 10-12 minutes until the glaze is caramelized and bubbling.
  5. Garnish and serve:
    Once the eggplants are done roasting, remove them from the oven and sprinkle with sesame seeds and sliced green onions. Serve hot as a main dish or side.

Prep Time:

10 minutes

Cook Time:

40 minutes

Total Time:

50 minutes


Servings:

Serves 4


Nutritional Information (Per Serving)

  • Calories: 210 kcal
  • Protein: 4g
  • Fat: 12g
  • Saturated Fat: 2g
  • Carbohydrates: 22g
  • Fiber: 7g
  • Sugar: 10g
  • Sodium: 550mg

Additional Information:

Miso glazed eggplant is inspired by Japanese flavors, making it a popular dish in fusion cuisine. The miso glaze offers a balance of sweet and savory, while roasting the eggplant brings out its creamy texture. This dish is perfect as a plant-based entrée or an elegant side dish.

Diets:
This dish fits into the following dietary lifestyles:

  • Vegan (if using maple syrup)
  • Vegetarian
  • Mediterranean
  • Gluten-Free (if using tamari instead of soy sauce)
  • Low-Carb

When to Serve:
Miso glazed eggplant can be served as a hearty main dish or as a flavorful side to accompany dishes like rice, quinoa, or grilled meats. Its rich flavors and vibrant presentation make it perfect for dinner parties, casual meals, or as a light yet satisfying lunch.


Notes:

  • Choosing the right miso: White miso (shiro miso) is sweeter and milder than red miso, which would give the glaze a stronger, saltier flavor. For this dish, white miso works best.
  • Additional toppings: Try adding fresh herbs like cilantro or drizzle with a touch of chili oil for added spice.

Read More

Crispy Smashed Potatoes with Garlic Herb Butter

Description:
Crispy smashed potatoes are a trending side dish that offers the perfect combination of crispy edges and a fluffy interior. Topped with a savory garlic herb butter, these potatoes are a delightful addition to any meal. They are roasted to golden perfection and finished with a fresh herb garnish. This dish is simple to make yet packed with flavor, making it ideal for weeknight dinners or entertaining guests.


Ingredients

  • 1.5 lbs baby potatoes (red or yellow)
  • 3 tbsp olive oil
  • 4 tbsp unsalted butter, melted
  • 4 garlic cloves, minced
  • 1 tsp dried thyme
  • 1 tsp dried rosemary
  • Salt and pepper, to taste
  • Fresh parsley, chopped (for garnish)
  • Parmesan cheese (optional, for garnish)

Instructions

  1. Preheat the oven:
    Preheat your oven to 425°F (220°C) and line a large baking sheet with parchment paper.
  2. Boil the potatoes:
    Place the baby potatoes in a large pot of salted water. Bring to a boil and cook for 15-20 minutes until they are fork-tender. Drain and let them cool slightly.
  3. Smash the potatoes:
    Place the boiled potatoes on the prepared baking sheet. Use the back of a fork or a potato masher to gently smash each potato, flattening them but keeping them intact.
  4. Prepare the garlic herb butter:
    In a small bowl, mix the melted butter, minced garlic, thyme, rosemary, salt, and pepper. Brush the garlic herb butter generously over the smashed potatoes.
  5. Roast the potatoes:
    Drizzle the potatoes with olive oil and roast for 25-30 minutes, or until the edges are golden and crispy. Halfway through, rotate the baking sheet to ensure even roasting.
  6. Garnish and serve:
    Remove the potatoes from the oven and garnish with fresh parsley. For extra flavor, sprinkle with Parmesan cheese if desired. Serve hot and enjoy!

Prep Time:

10 minutes

Cook Time:

45 minutes

Total Time:

55 minutes


Servings:

Serves 4


Nutritional Information (Per Serving)

  • Calories: 320 kcal
  • Protein: 4g
  • Fat: 18g
  • Saturated Fat: 7g
  • Carbohydrates: 37g
  • Fiber: 4g
  • Sugar: 2g
  • Sodium: 320mg

Additional Information:

Crispy smashed potatoes have become a popular dish thanks to their irresistible texture and easy preparation. These roasted potatoes are crispy on the outside with a tender inside, making them a perfect accompaniment to various main dishes. Garlic herb butter elevates their flavor, making them a crowd favorite.

Diets:
This dish fits into the following dietary lifestyles:

  • Vegetarian
  • Mediterranean
  • Gluten-Free
  • Low-Carb

When to Serve:
Crispy smashed potatoes are perfect for lunch, dinner, or as a side for a holiday gathering. The combination of garlic, herbs, and buttery potatoes makes this dish a comfort food classic, ideal for any occasion.


Notes:

  • Potato Variety: Baby potatoes work best for this recipe as they have a tender skin that crisps up nicely when roasted.
  • Seasoning Variations: You can add chili flakes for a spicy twist or swap herbs like thyme and rosemary for oregano or basil to suit your preferences.

Read More

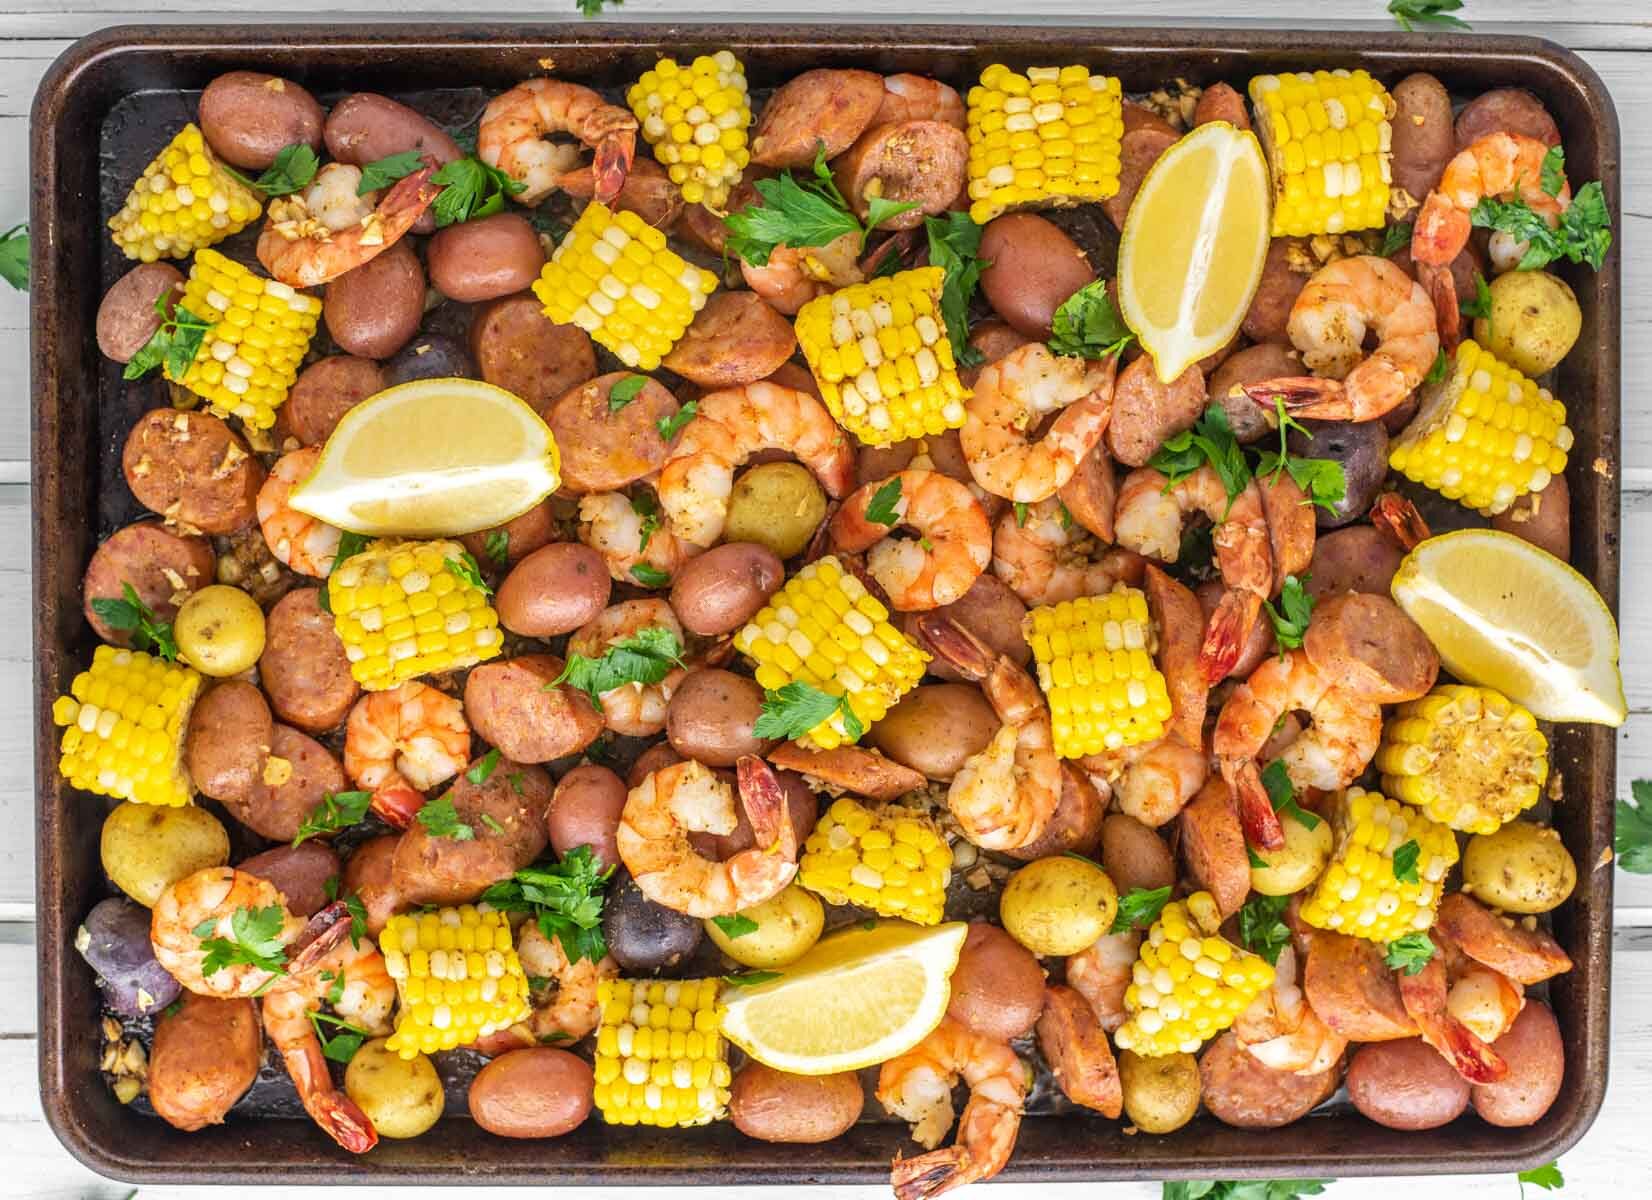
Sheet Pan Shrimp Boil

Description:
This Sheet Pan Shrimp Boil is the ultimate easy shrimp boil recipe that’s perfect for a one-pan weeknight dinner or a casual gathering. Featuring tender shrimp, savory sausage, fresh corn, and hearty potatoes, this oven shrimp boil brings all the flavors of a classic seafood boil without the mess. Seasoned with bold Old Bay seasoning, this dish is roasted to perfection for a quick and delicious meal.


Ingredients for Sheet Pan Shrimp Boil

  • 1 lb large shrimp, peeled and deveined (tails on or off)
  • 1 lb baby red potatoes, halved
  • 2 ears of corn, each cut into 4 pieces
  • 12 oz smoked sausage, sliced
  • 3 tbsp olive oil
  • 2 tbsp Old Bay seasoning
  • 3 garlic cloves, minced
  • 1 lemon, sliced
  • 2 tbsp unsalted butter, melted
  • Fresh parsley, chopped (for garnish)
  • Lemon wedges, for serving

Instructions for Sheet Pan Shrimp Boil

  1. Preheat the oven:
    Preheat your oven to 400°F (200°C). Line a large baking sheet with parchment paper or aluminum foil for easy cleanup.
  2. Prepare the potatoes and corn:
    Toss the halved baby potatoes and corn pieces with 1 tablespoon of olive oil and 1 tablespoon of Old Bay seasoning. Spread them in an even layer on the baking sheet. Roast for 15 minutes.
  3. Add the sausage:
    Remove the sheet from the oven and add the sliced smoked sausage. Toss everything together and return to the oven for an additional 10 minutes.
  4. Prepare the shrimp:
    In a small bowl, toss the shrimp with the remaining 2 tablespoons of olive oil, 1 tablespoon of Old Bay seasoning, and minced garlic.
  5. Roast the shrimp:
    Remove the sheet from the oven and add the seasoned shrimp to the pan. Spread everything out evenly. Drizzle the melted butter over the entire pan. Roast for an additional 8-10 minutes, or until the shrimp are pink and cooked through.
  6. Garnish and serve:
    Remove the sheet from the oven and garnish with fresh parsley and lemon slices. Serve hot with lemon wedges on the side.

Prep Time:

15 minutes

Cook Time:

35 minutes

Total Time:

50 minutes


Servings:

Serves 4


Nutritional Information for Sheet Pan Shrimp Boil (Per Serving)

  • Calories: 480 kcal
  • Protein: 32g
  • Fat: 27g
  • Saturated Fat: 9g
  • Carbohydrates: 27g
  • Fiber: 4g
  • Sugar: 3g
  • Sodium: 1350mg

Additional Information about Sheet Pan Shrimp Boil

This Sheet Pan Shrimp Boil is an easy, oven-baked version of the traditional seafood boil, bringing all the same flavors with less cleanup. The one-pan shrimp boil combines fresh shrimp, sausage, corn, and potatoes, all tossed in classic Old Bay seasoning. Whether you’re craving a simple shrimp boil recipe for a weeknight dinner or need a crowd-pleasing dish, this recipe delivers every time.

Diets:
This dish fits into the following dietary lifestyles:

  • Gluten-Free (if gluten-free sausage is used)
  • Paleo
  • Low-Carb
  • Keto

Notes:

  • Customizing the spice level: You can adjust the amount of Old Bay seasoning based on your preference. Add more if you like it spicy or reduce it for a milder flavor.
  • Fresh vs. Frozen Shrimp: If using frozen shrimp, make sure to fully thaw and pat them dry before roasting to prevent excess moisture.
  • Serving suggestion: Serve with crusty bread to soak up the butter and juices from the shrimp boil.

Read More

Spaghetti Aglio e Olio (Garlic and Olive Oil Pasta)

Description:
Spaghetti Aglio e Olio is a simple yet flavorful Italian dish made with only a few ingredients—spaghetti, garlic, olive oil, and red pepper flakes. It’s a quick and easy meal that’s both affordable and delicious, often enjoyed as a weeknight dinner or late-night comfort food in Italy. The dish showcases how just a handful of pantry staples can come together to create a satisfying, restaurant-quality meal.


Ingredients

  • 12 oz spaghetti
  • 1/3 cup extra virgin olive oil
  • 6 garlic cloves, thinly sliced
  • 1/2 tsp red pepper flakes (adjust to taste)
  • 1/4 cup fresh parsley, chopped
  • Salt, to taste
  • Freshly ground black pepper, to taste
  • Grated Parmesan cheese (optional, for serving)

Instructions

  1. Cook the spaghetti:
    Bring a large pot of salted water to a boil. Cook the spaghetti according to package instructions until al dente. Reserve about 1/2 cup of pasta water, then drain the rest.
  2. Prepare the garlic and oil:
    While the pasta is cooking, heat the olive oil in a large skillet over medium heat. Add the sliced garlic and cook, stirring frequently, until the garlic is golden brown and crispy (about 2-3 minutes). Be careful not to burn the garlic.
  3. Add red pepper flakes:
    Once the garlic is golden, add the red pepper flakes and cook for another 30 seconds, allowing the flavors to infuse the oil.
  4. Toss the spaghetti:
    Add the cooked spaghetti to the skillet with the garlic and oil. Toss to coat the pasta in the garlic-infused oil. If the pasta seems dry, add a few tablespoons of reserved pasta water to loosen it up. Season with salt and freshly ground black pepper to taste.
  5. Garnish and serve:
    Remove from heat and toss in the chopped parsley. Serve the spaghetti immediately with an optional sprinkle of grated Parmesan cheese on top.

Prep Time:

5 minutes

Cook Time:

15 minutes

Total Time:

20 minutes


Servings:

Serves 4


Nutritional Information (Per Serving)

  • Calories: 400 kcal
  • Protein: 9g
  • Fat: 18g
  • Saturated Fat: 2.5g
  • Carbohydrates: 52g
  • Fiber: 3g
  • Sugar: 2g
  • Sodium: 240mg

Additional Information:

Spaghetti Aglio e Olio is a beloved Italian classic that originated in Naples. It’s known for its simplicity and bold flavors, despite the minimal ingredients. The dish allows the quality of the olive oil and garlic to shine, so using high-quality extra virgin olive oil is recommended for the best results.

Diets:
This dish fits into the following dietary lifestyles:

  • Vegetarian
  • Mediterranean
  • Vegan (if served without Parmesan)
  • Dairy-Free
  • Gluten-Free (if made with gluten-free pasta)

When to Serve Spaghetti Aglio e Olio:
This dish is perfect for a quick weeknight meal or a dinner party starter. It’s easy to make, requires minimal ingredients, and delivers maximum flavor. While it’s often served as a main course, you can also pair it with a fresh salad or roasted vegetables for a more balanced meal.

Key Tips for the Perfect Aglio e Olio:

  • Garlic: Make sure to slice the garlic thinly and cook it on medium heat to prevent it from burning. Burnt garlic can turn bitter and alter the flavor of the dish.
  • Spaghetti texture: Cook the spaghetti to al dente—firm to the bite. This ensures the pasta holds up well when tossed in the hot oil and garlic mixture.
  • Pasta water: Don’t forget to reserve a bit of the pasta water before draining. Adding this starchy water can help bind the sauce to the pasta and make the dish creamier.

Notes:

  • Spice level: You can adjust the amount of red pepper flakes based on your preference for heat. Add more if you like it spicy, or reduce it for a milder flavor.
  • Oil: The flavor of the olive oil plays a major role in this dish, so it’s recommended to use a high-quality extra virgin olive oil.
  • Make it heartier: For a more substantial meal, add sautéed vegetables like zucchini or mushrooms, or even some grilled shrimp.

This Spaghetti Aglio e Olio is a quick, flavorful, and easy-to-make dish that’s perfect for busy nights or as a delightful comfort meal. The simplicity of the ingredients allows the flavors to shine through, making it a timeless favorite.

Read More